• Blog
  • About
  • Custom Work Gallery
  • The Rooster's Frocks
Stitchery Dickery Dock

Easter Dress

4/6/2021

0 Comments

 
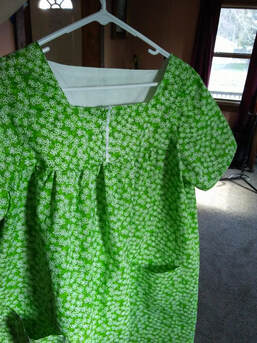
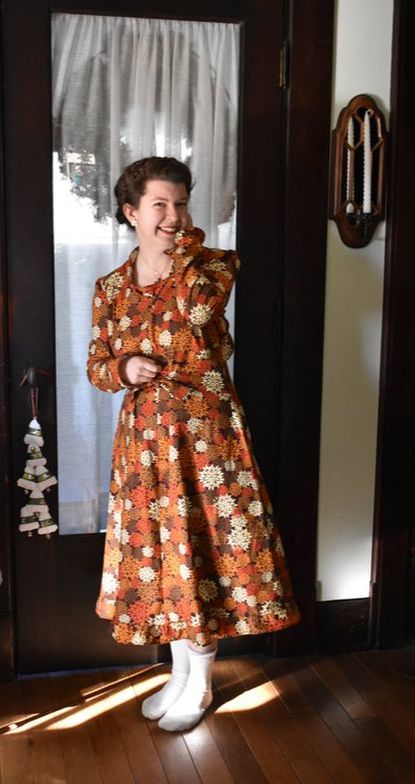
I determined to make myself an Easter dress this year. Partly just because I wanted to, partly because I am beginning to need a few more things I can wear to church.
Picture
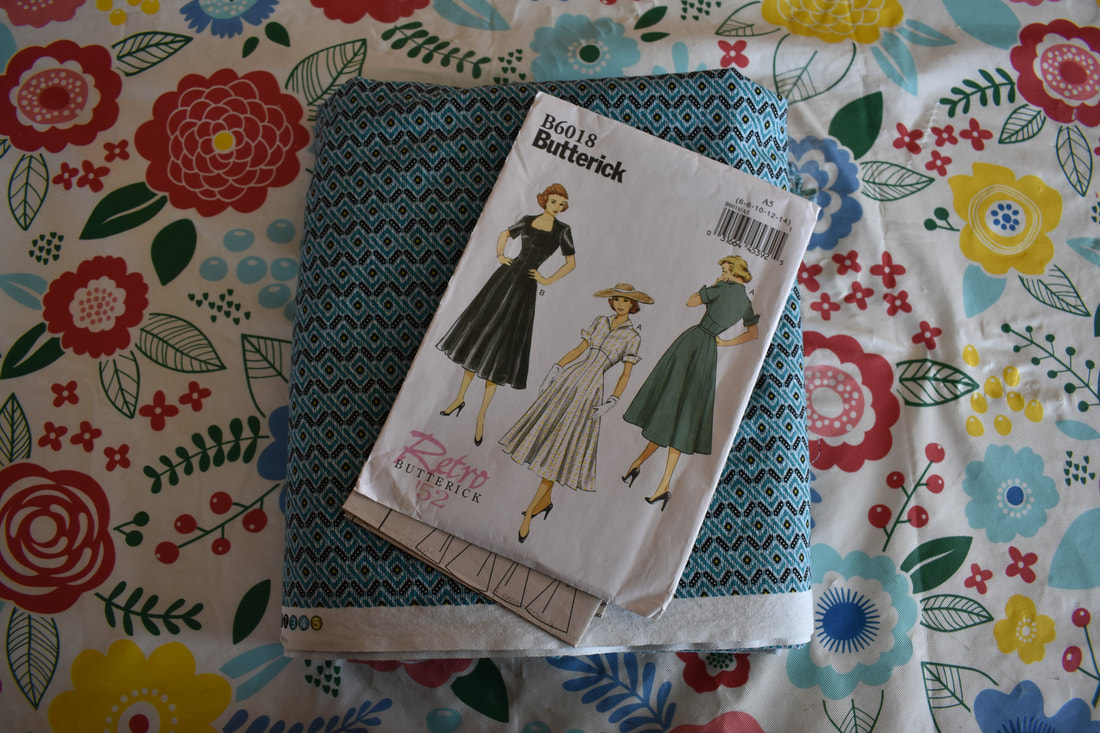
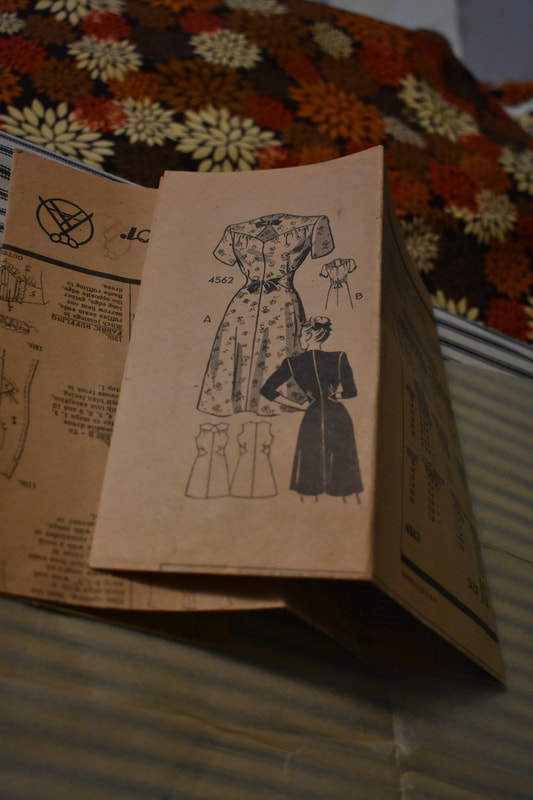
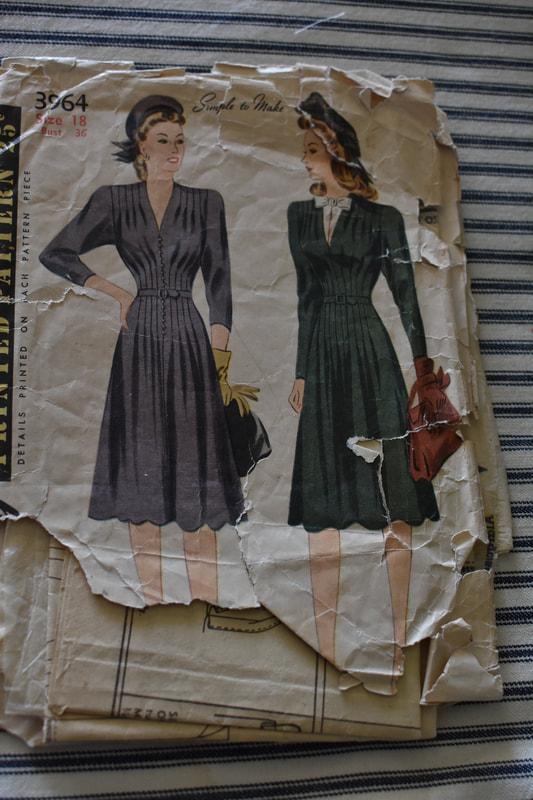
I went with this pattern and pulled the fabric out of my stash. When I pulled it out, I knew I might run into a bit of a sticky issue as the skirt front, as designed, wasn't going to work for my expanding baby bump. (Yes, baby bump...you read that right.) I hoped to make it up with the front actually functional (the buttons are just decorative) so I could also use it for nursing later. Jumping ahead slightly--it didn't work out that way.

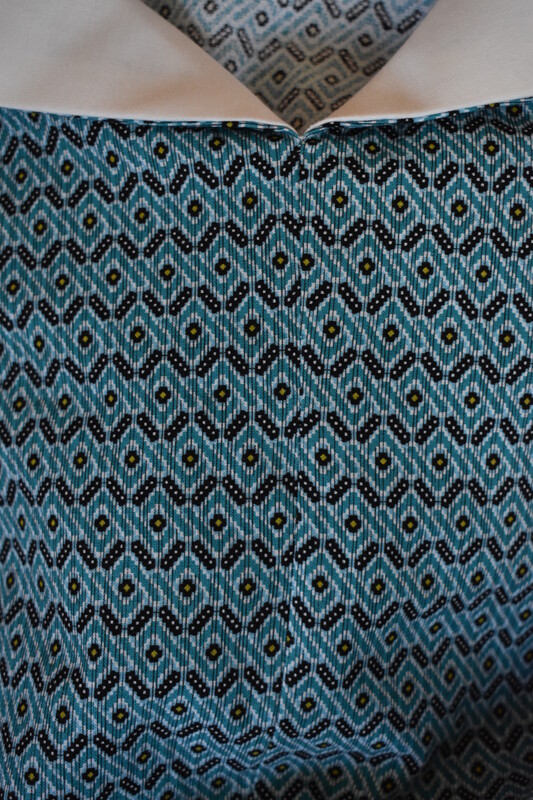
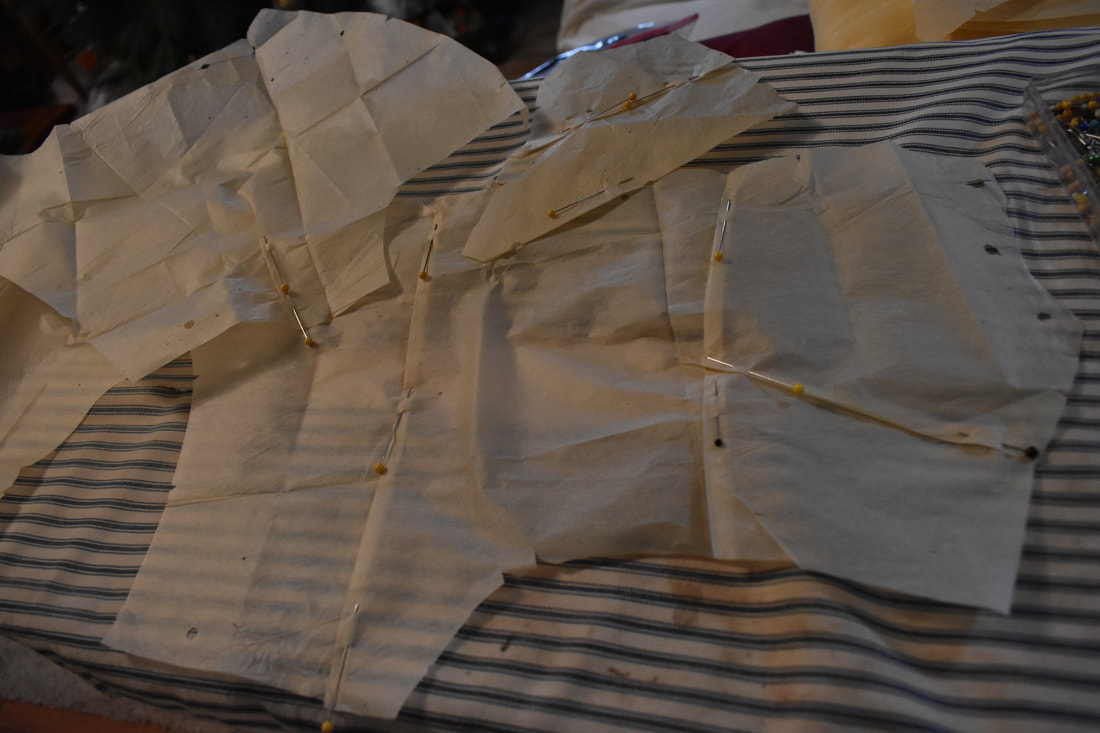
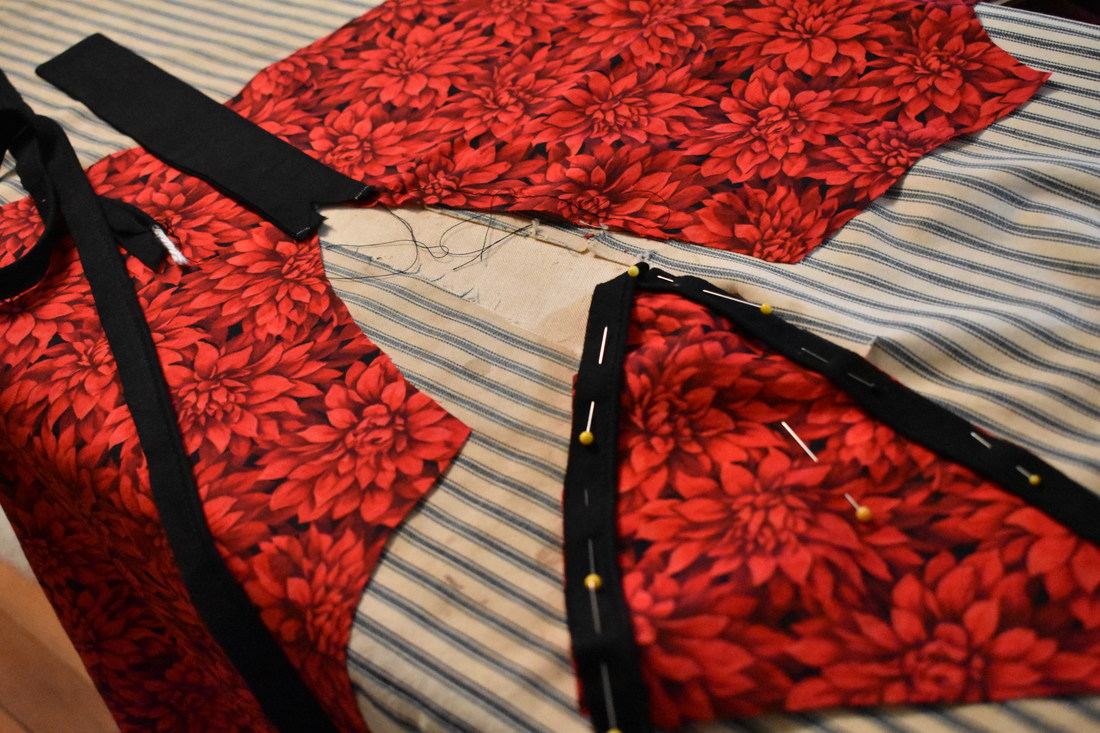
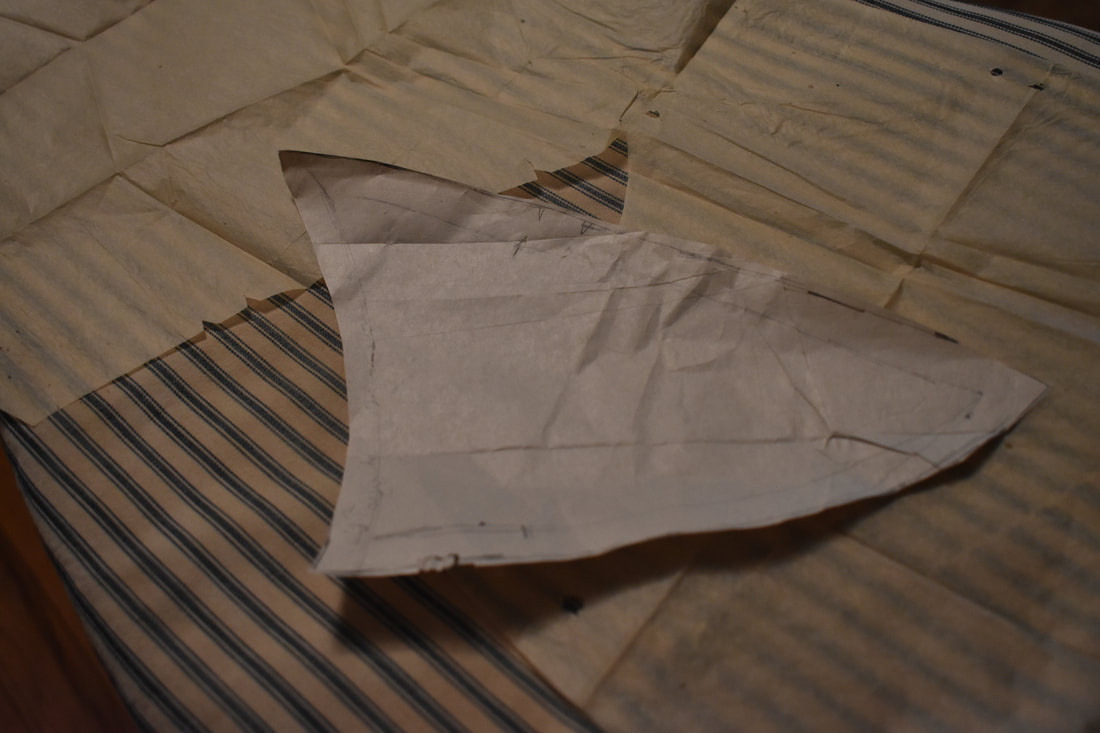
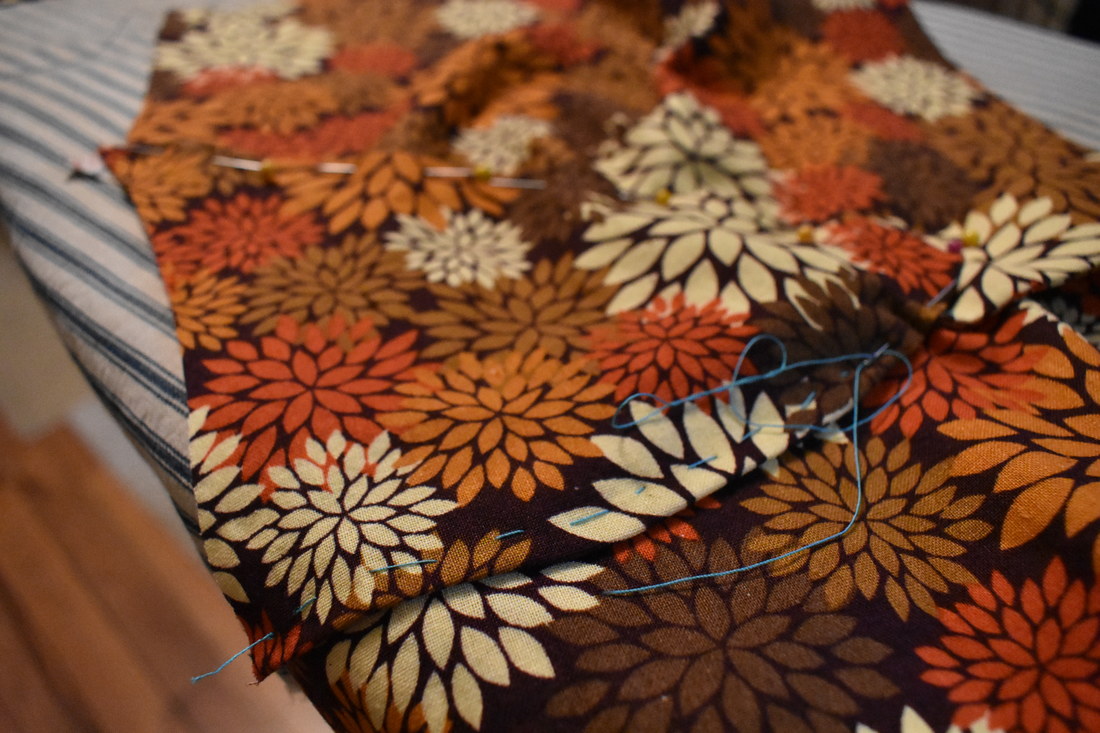
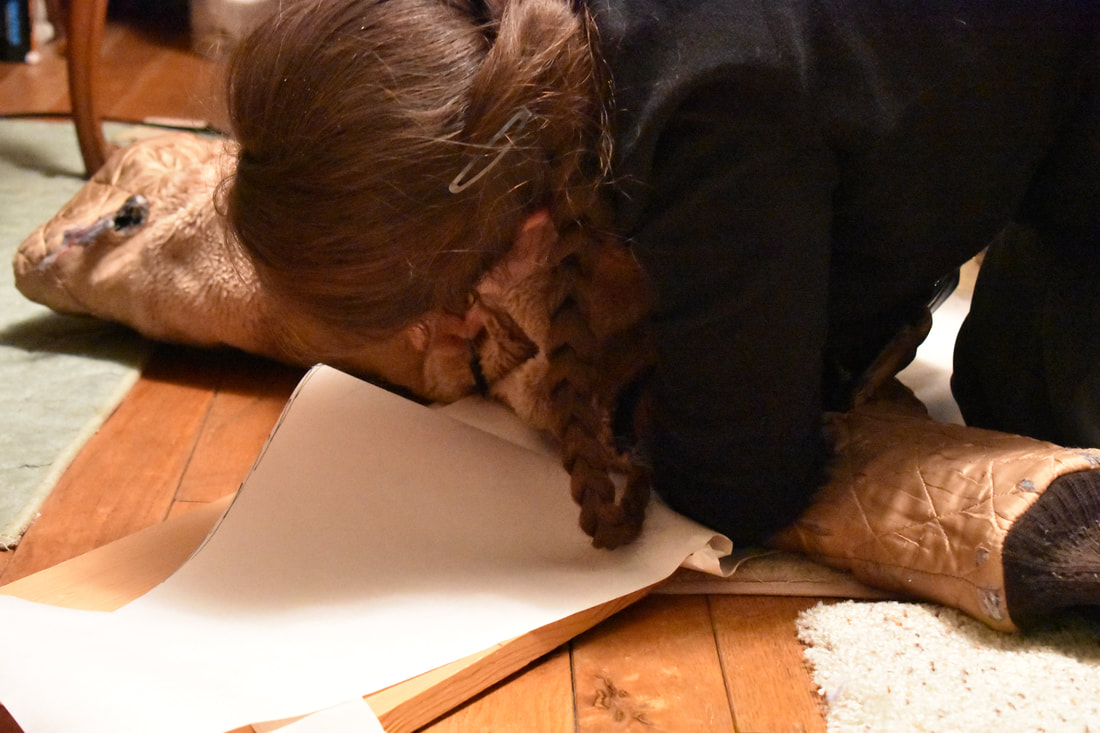
It took me nearly a whole day to actually get it cut out. Mostly because I was experimenting and relaying the fabric and pattern out not only to optimize my material, but mainly to find the best way to cut the skirt front so that I would have maximum grow room. (I ended up cutting the skirt with the design running vertically and the bodice with it running horizontally. It was the only way to get everything out of my material!)
Picture
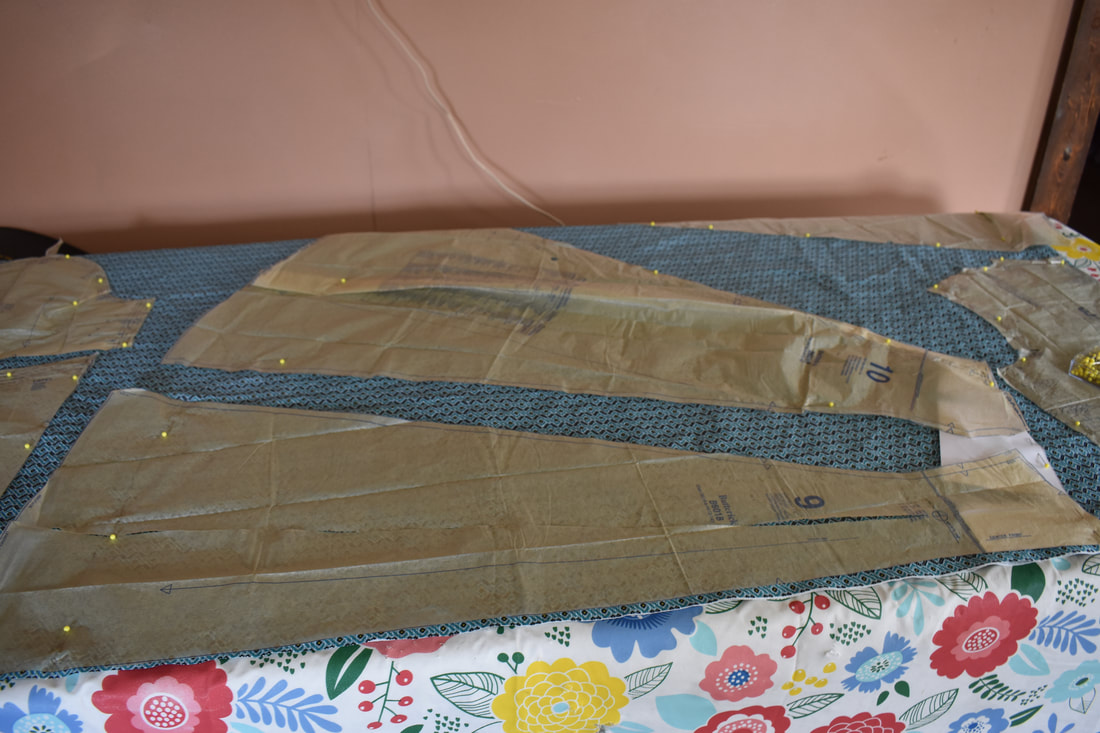
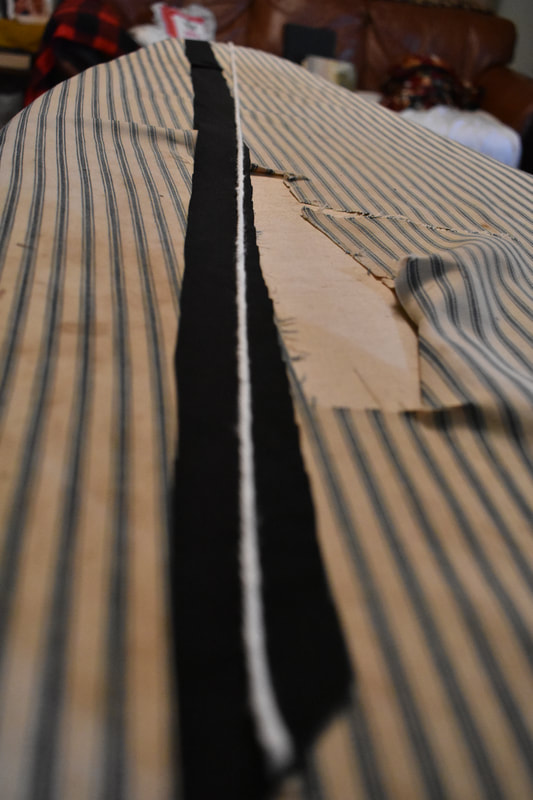
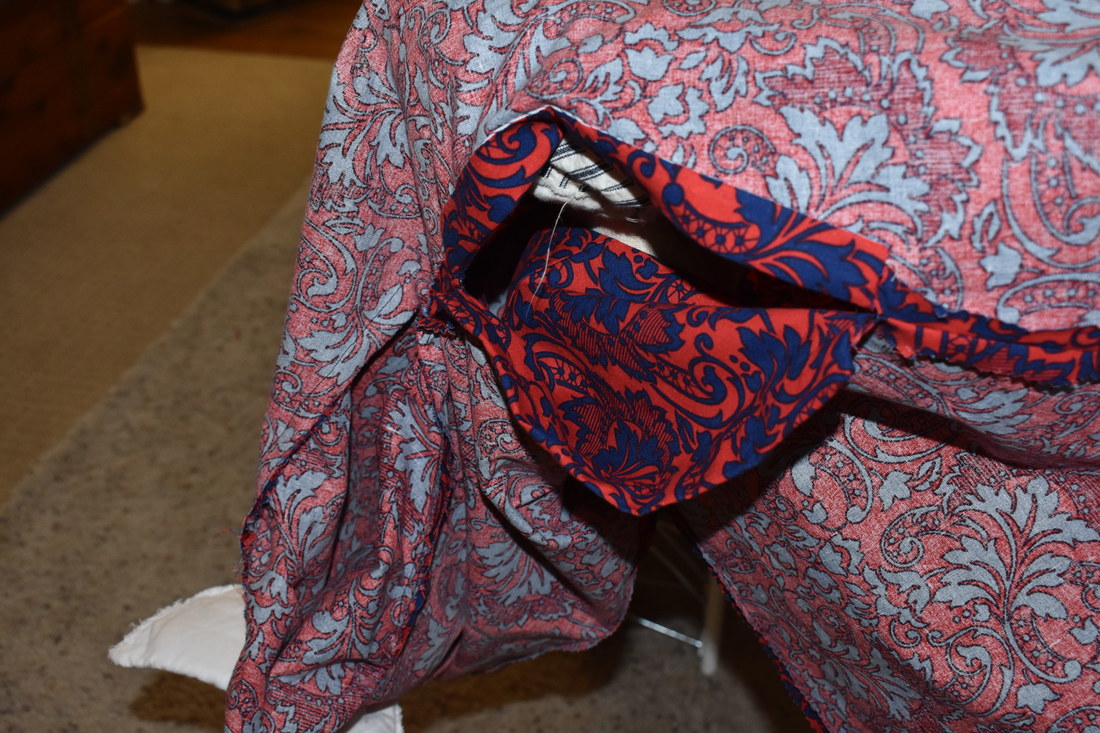
After two or three various attempts, I ended up by taking the curve and measurement of the two front panels together, then splitting it (that white piece of paper connecting the pattern pieces for the skirt panels). The front still ended up being on the grain (more or less), but the skirt definitely worked out this way.

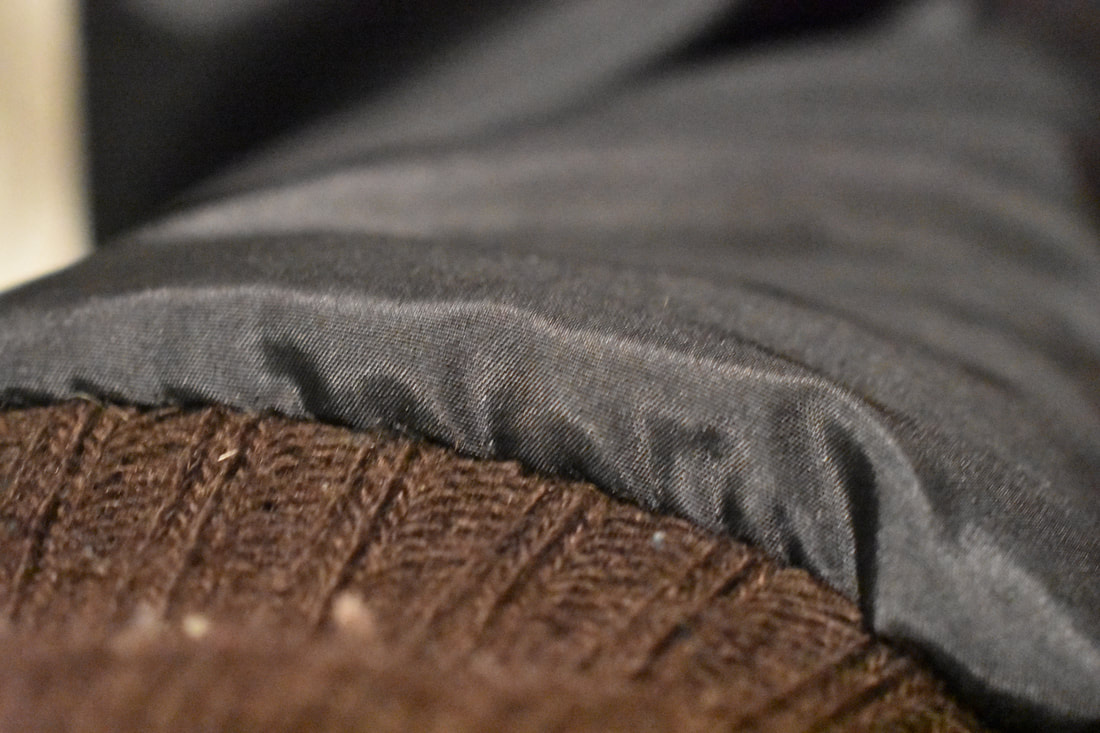
Before dealing with the bodice issue, I went ahead and sewed the skirt and bodice together and put the zipper in. It went in beautifully!
Picture
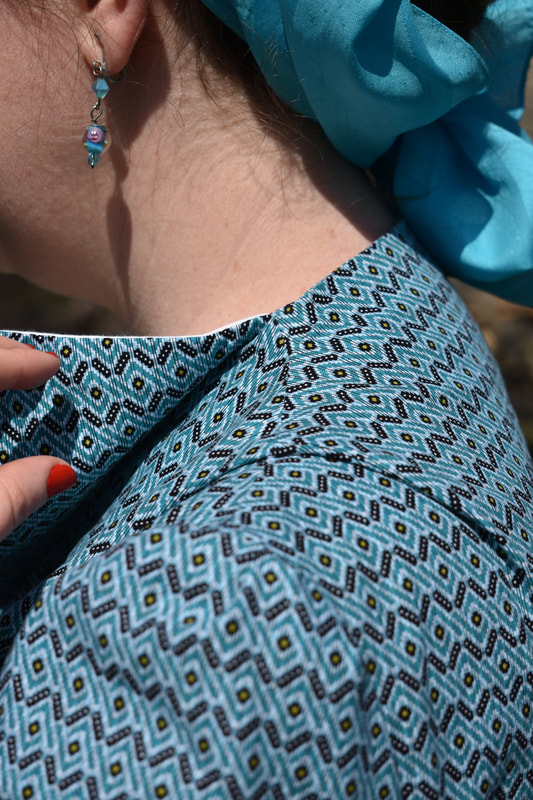
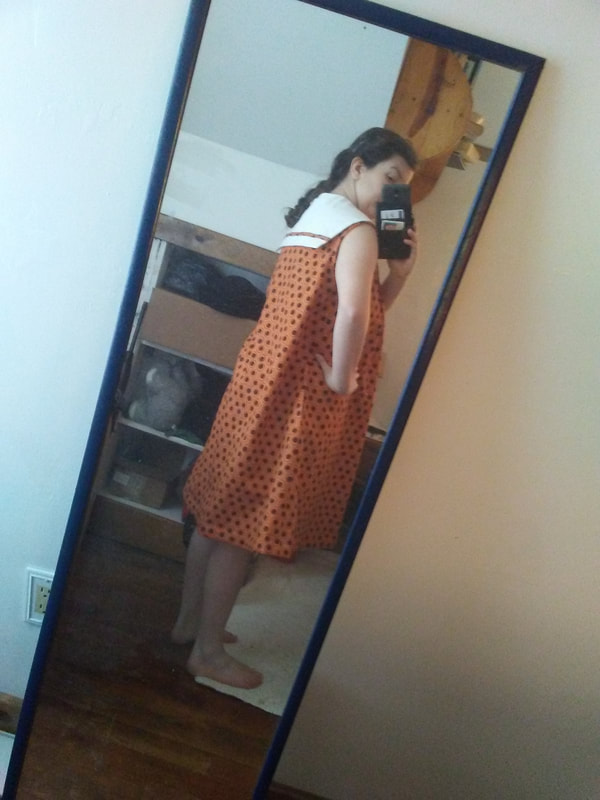
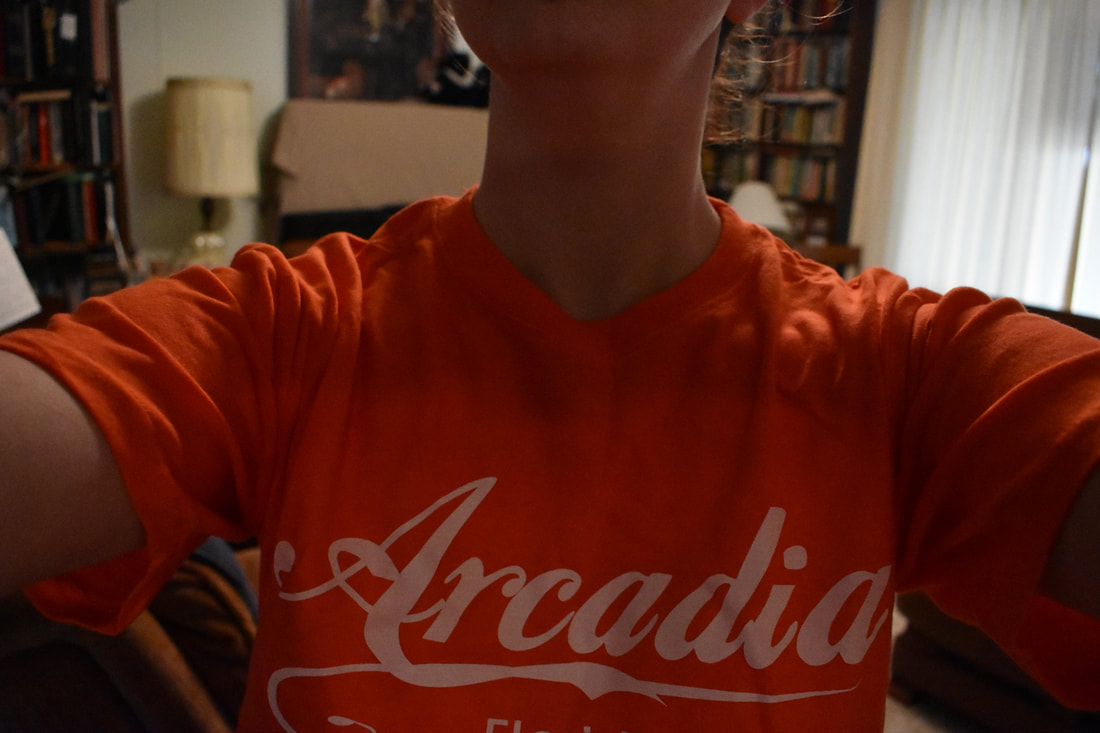
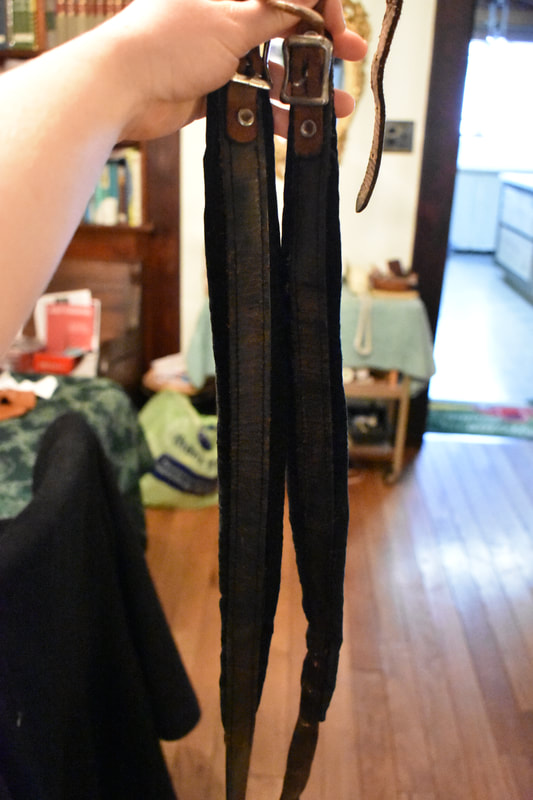
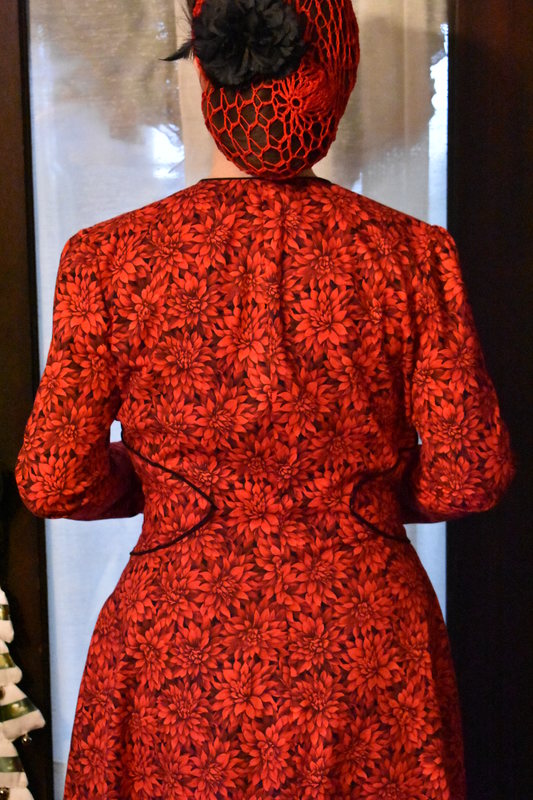
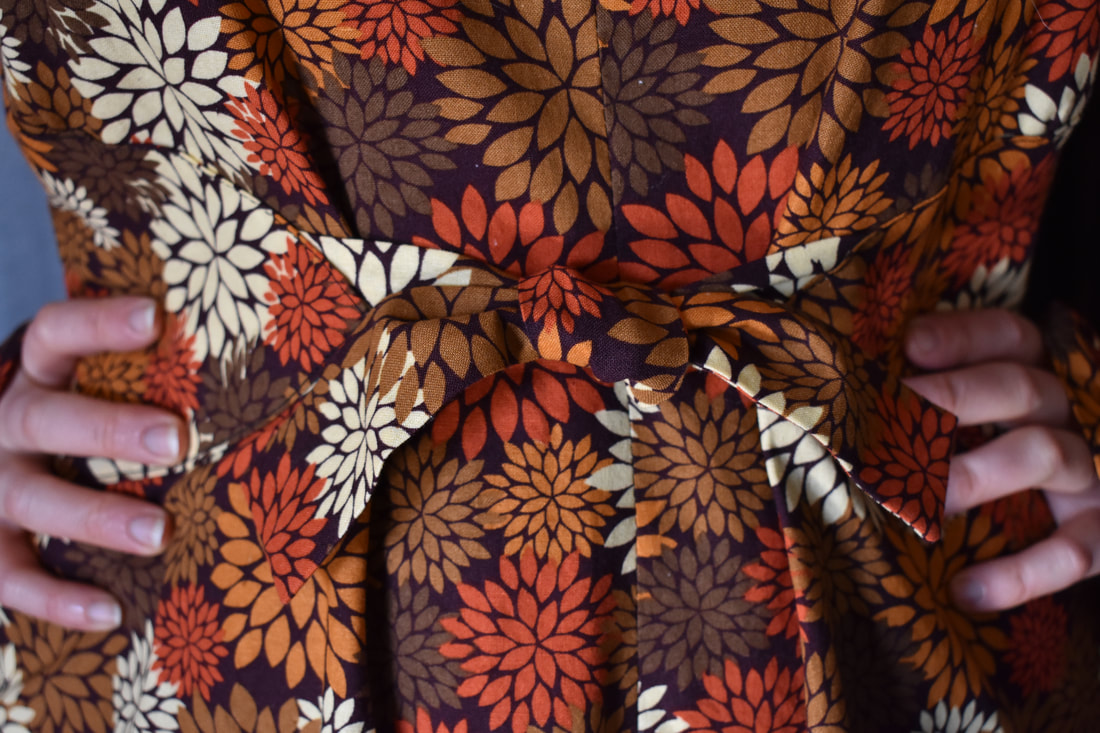
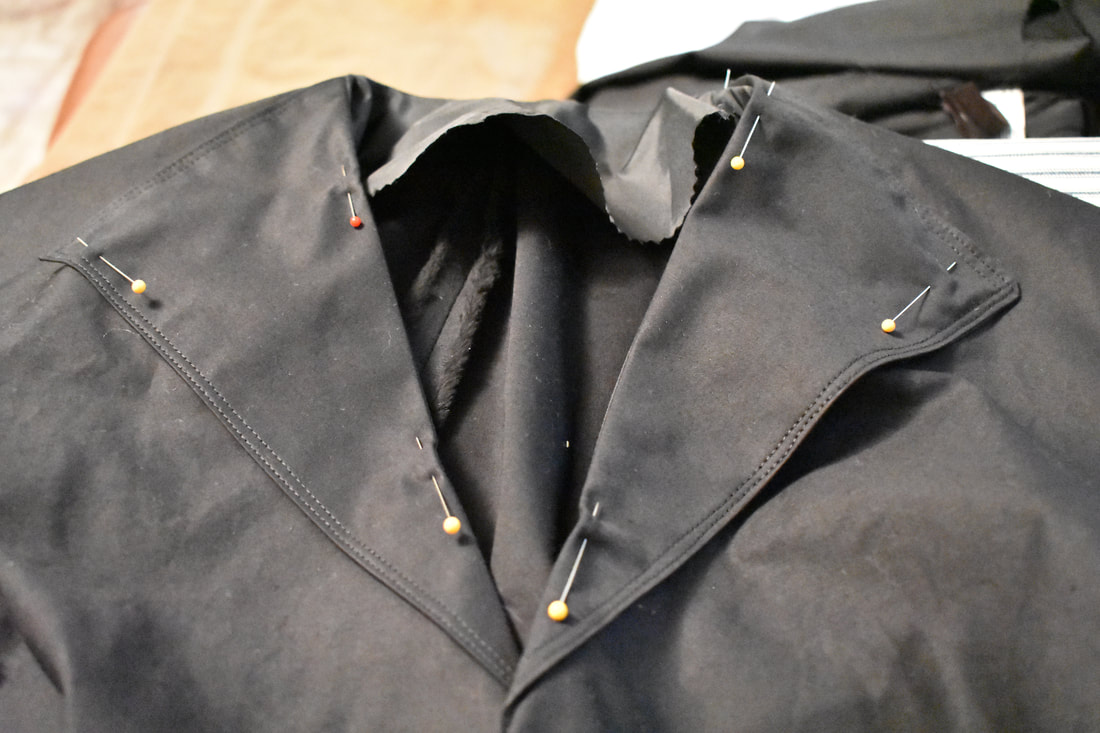
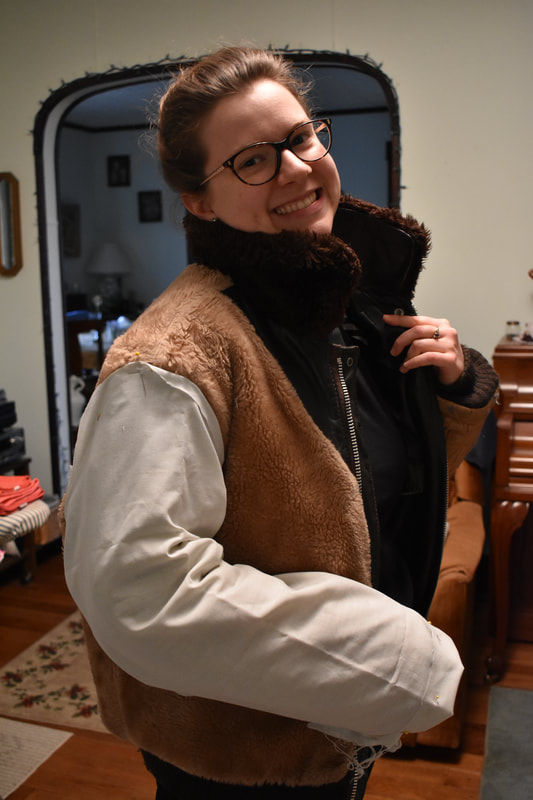
There were actually a couple of issues with the bodice. One was that I had forgotten to narrow the shoulders. Hence, a standby for me...some sort of external take-up, which serves as a decorative element:
Picture
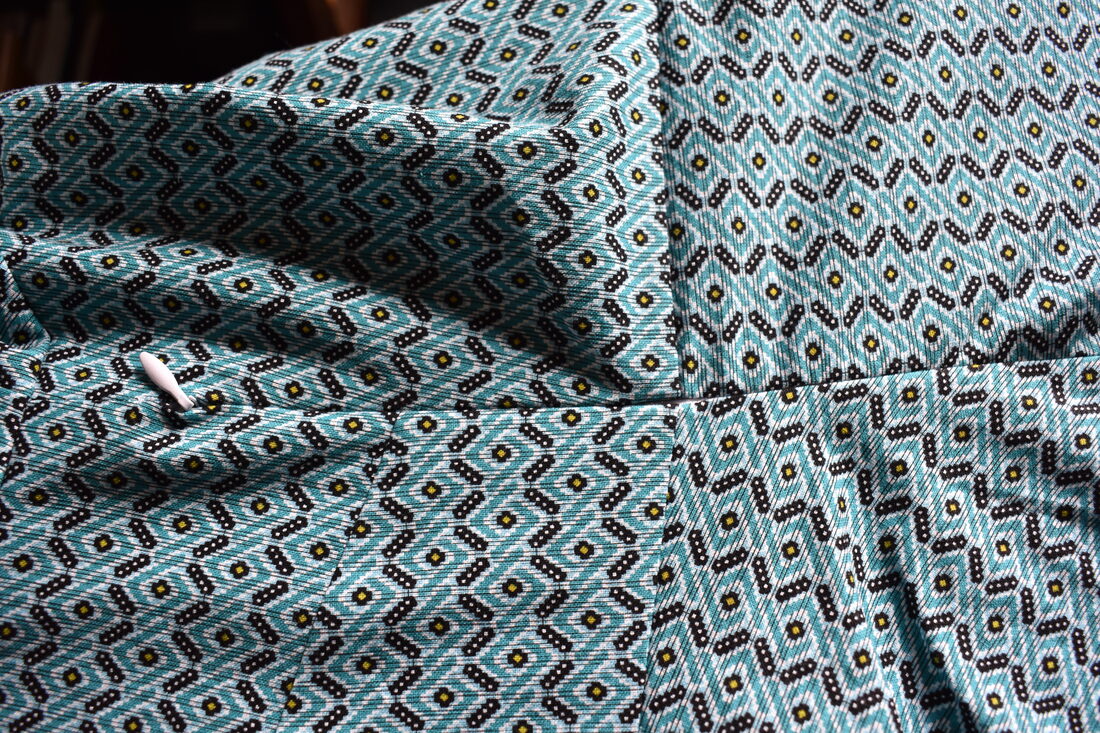
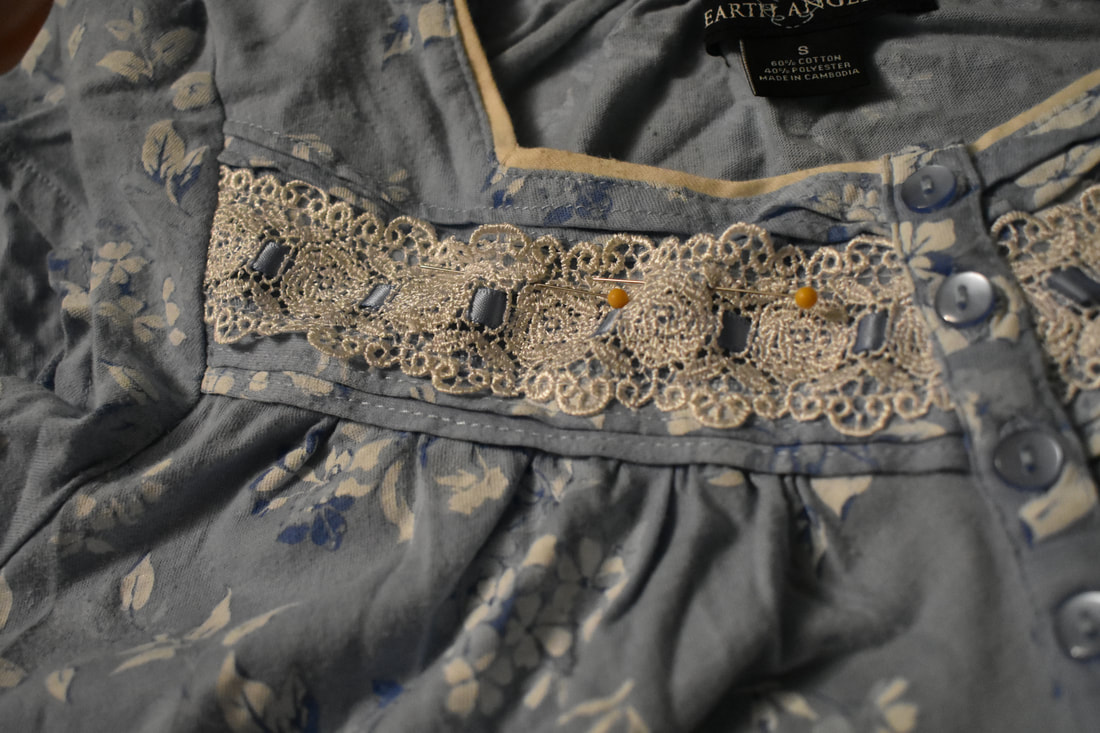
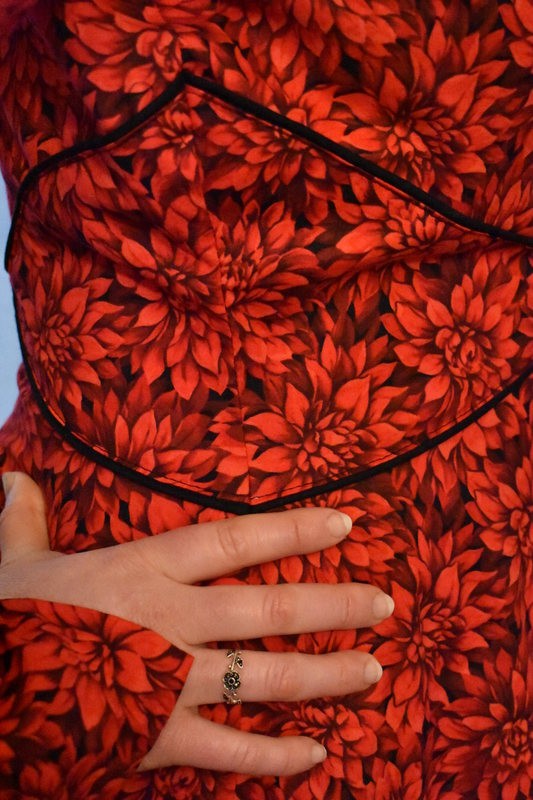
Secondly...the bodice front (what should have been a closure) didn't work right. The top was going to close...the lower part could be pulled together, but no way it was going to work for buttons. Even when I changed undergarments, it still wasn't going to do. So I just picked the best place to stitch up to...and sewed the front up. And decided to save my buttons for something else.
Picture
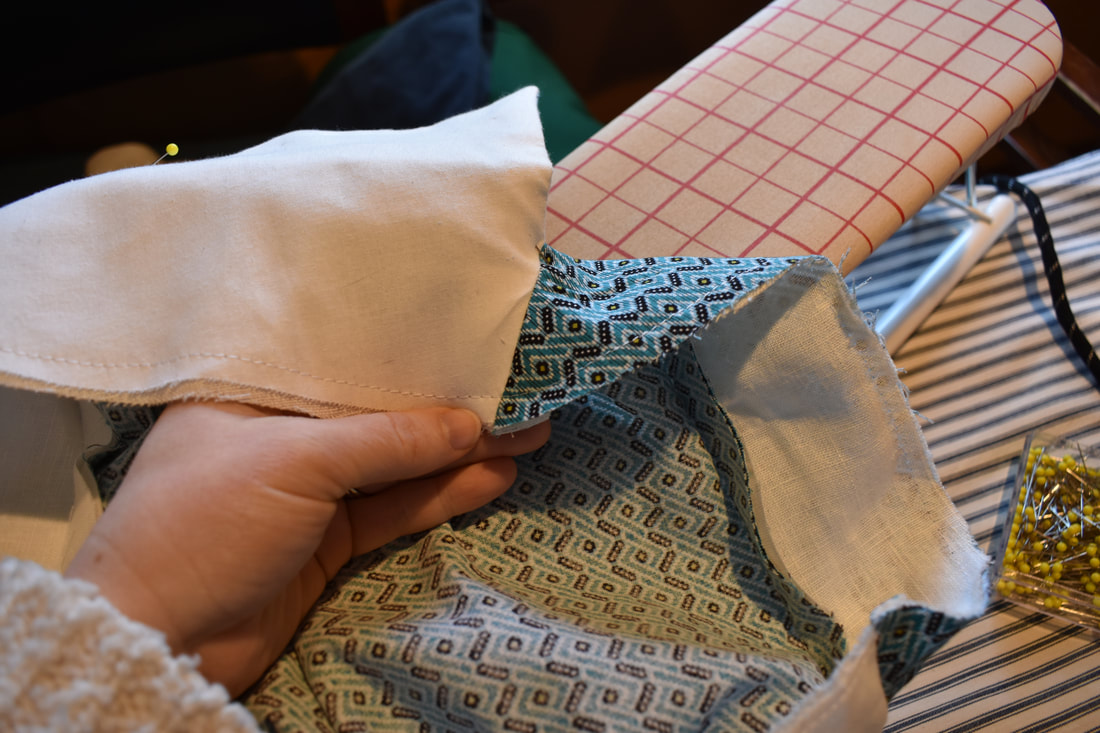
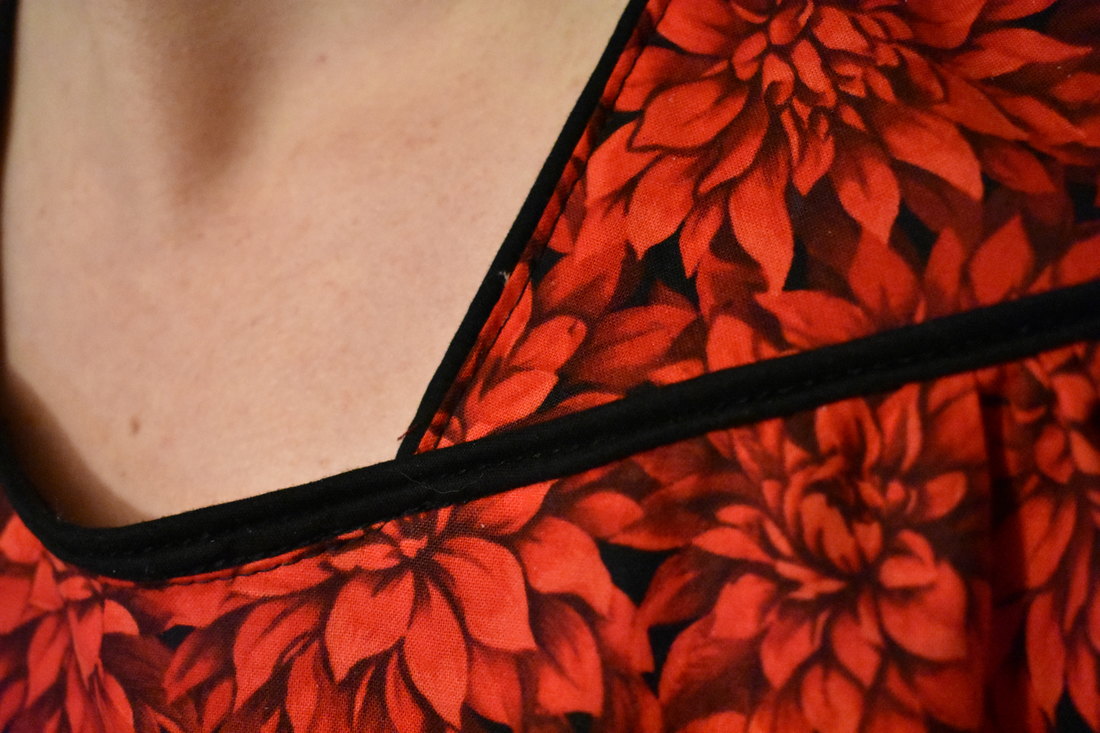
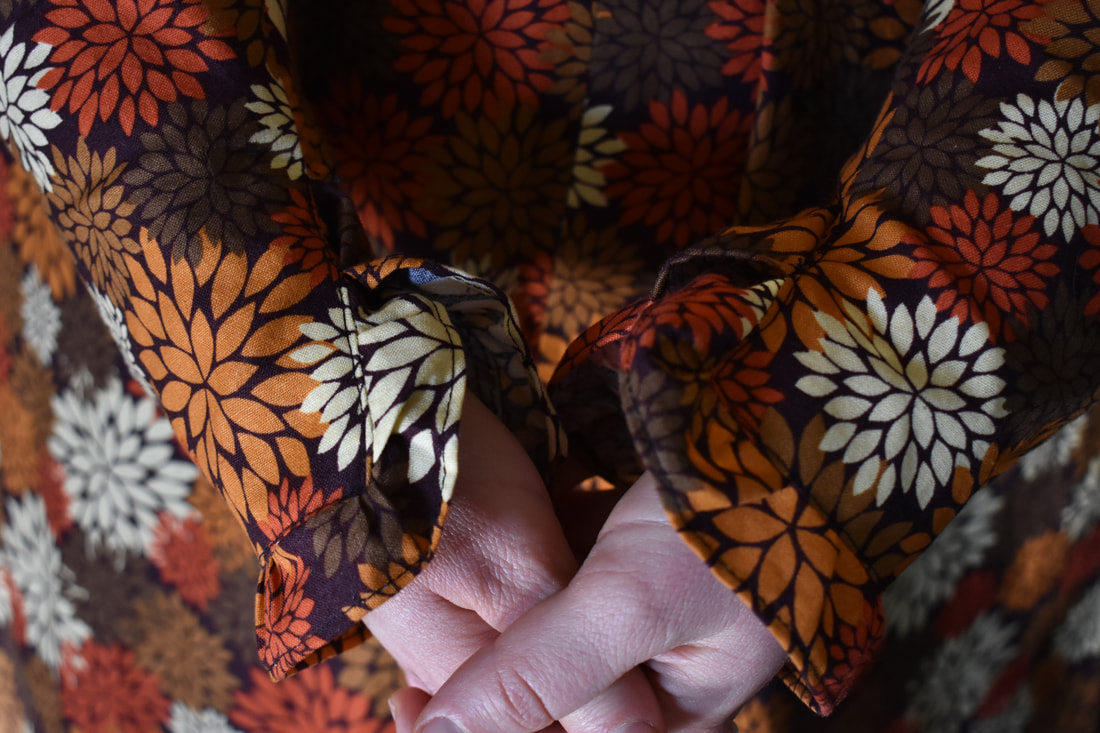
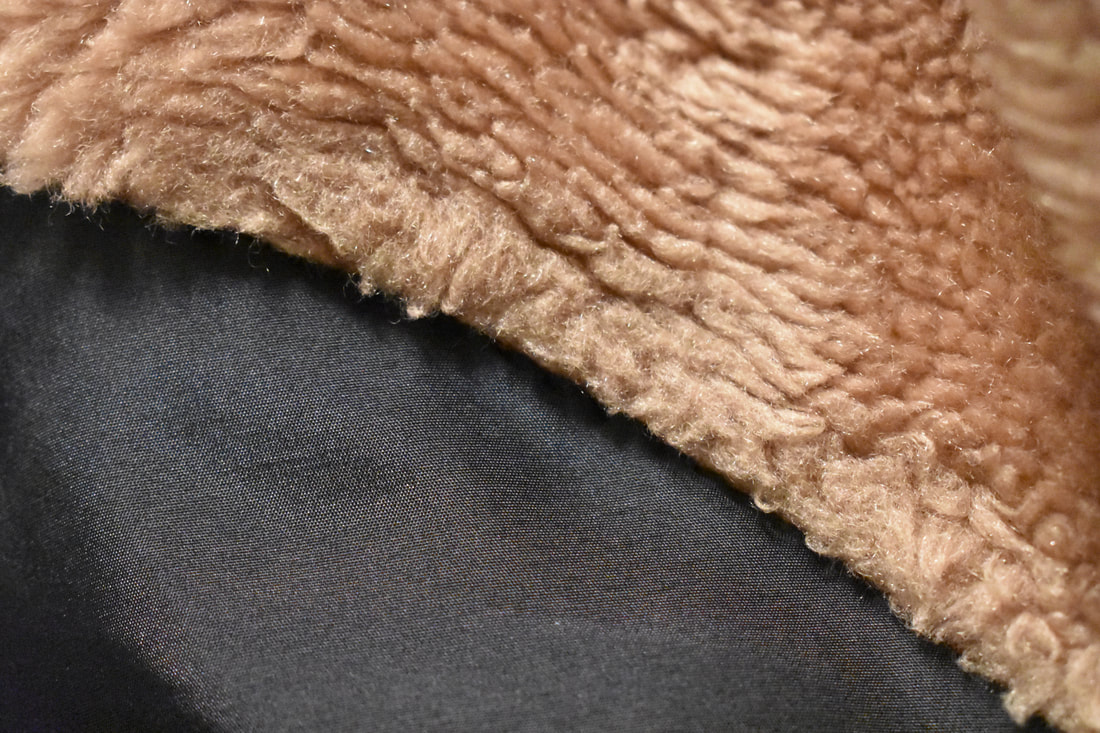
I didn't roll the facings, but just stay-stitched them. I didn't want the extra bulk around the edges. Speaking of facings, instead of using interfacing (of which I have none), I used a stiff linen. I have seen this technique in true vintage garments, so I didn't bulk at the idea. I used it for stiffening in my 18th century riding habit as well.
Picture
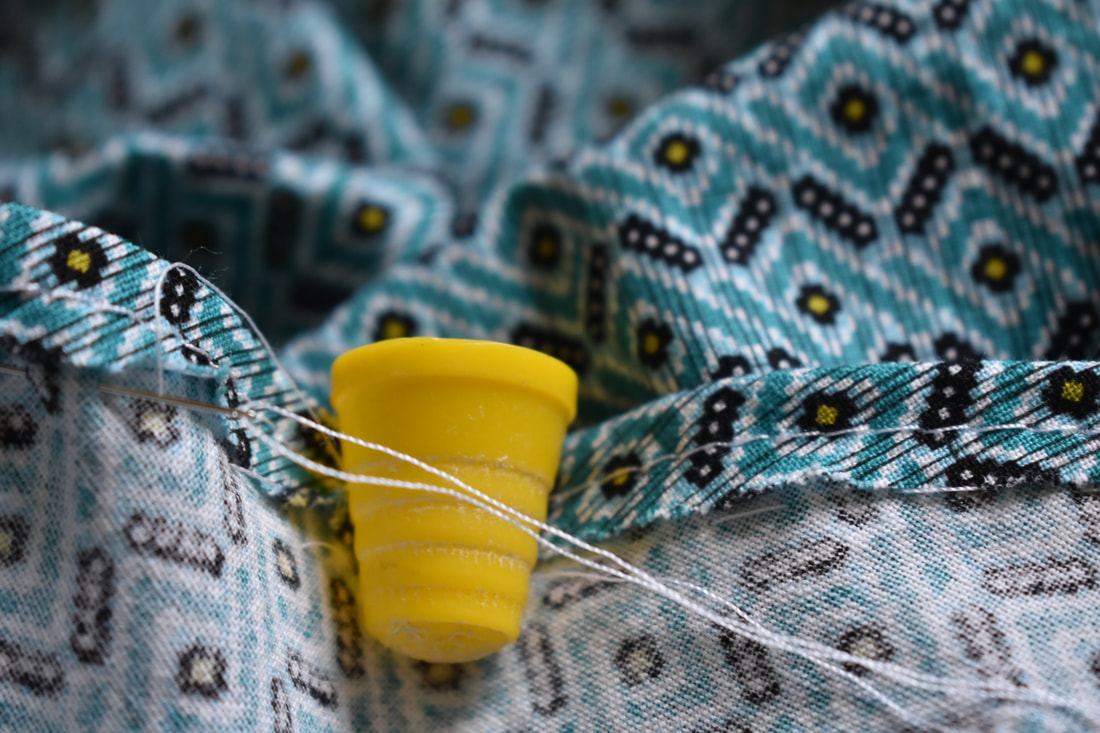
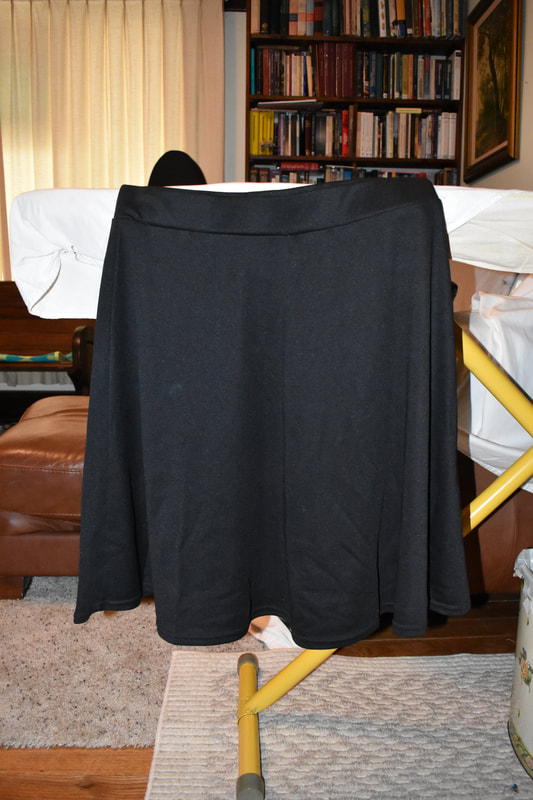
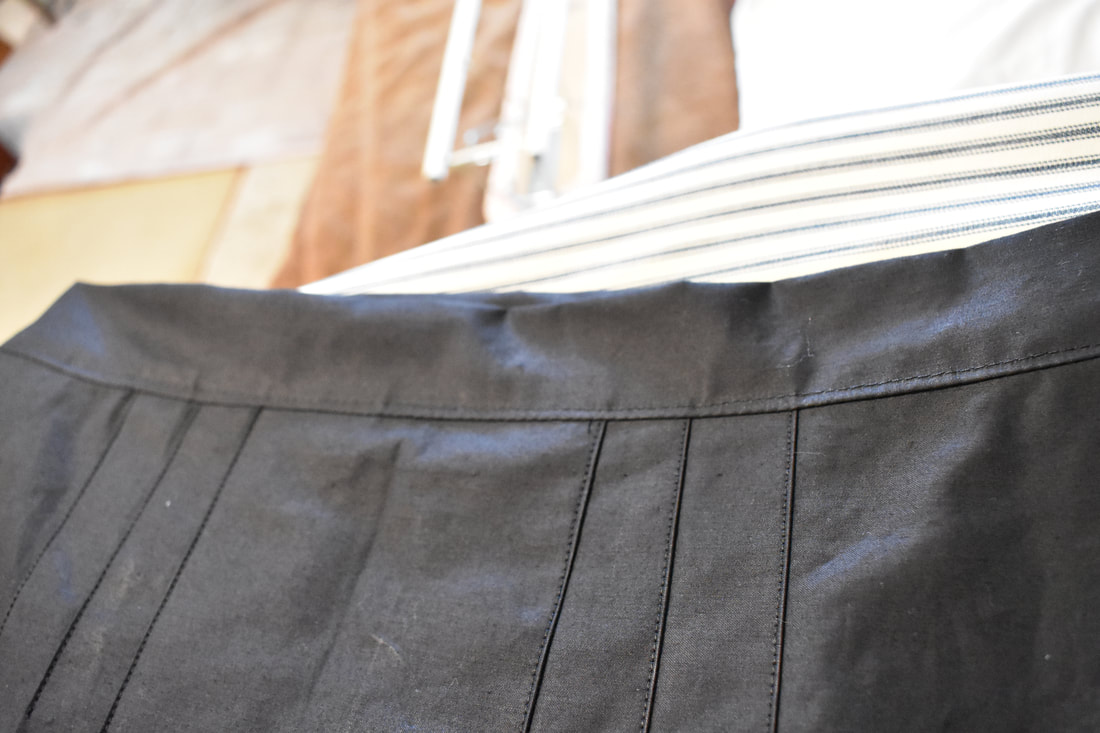
I hemmed the dress with a recently learned technique for full, curve hemmed skirts: a turn up, machine-stitched, then a basting (or gathering stitch). After turning up, you basically ease it, so it lays much better and flatter than just sticking weird pleats and puckers into a hem.
Picture
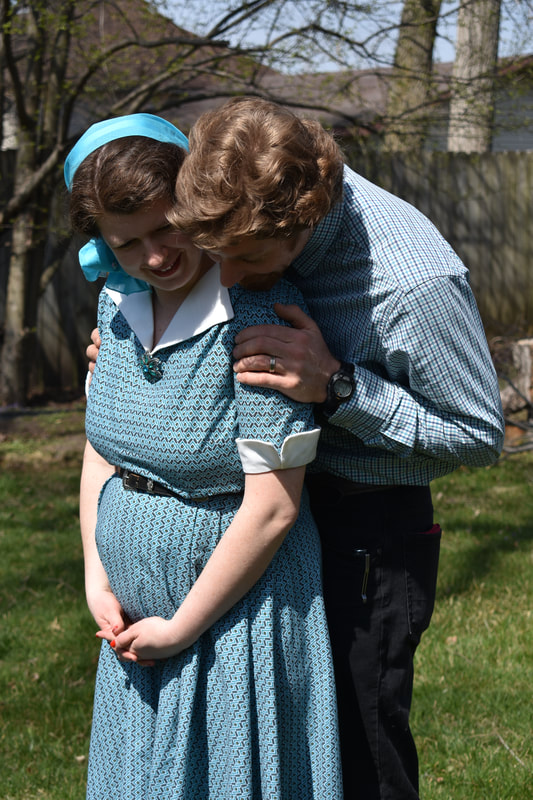
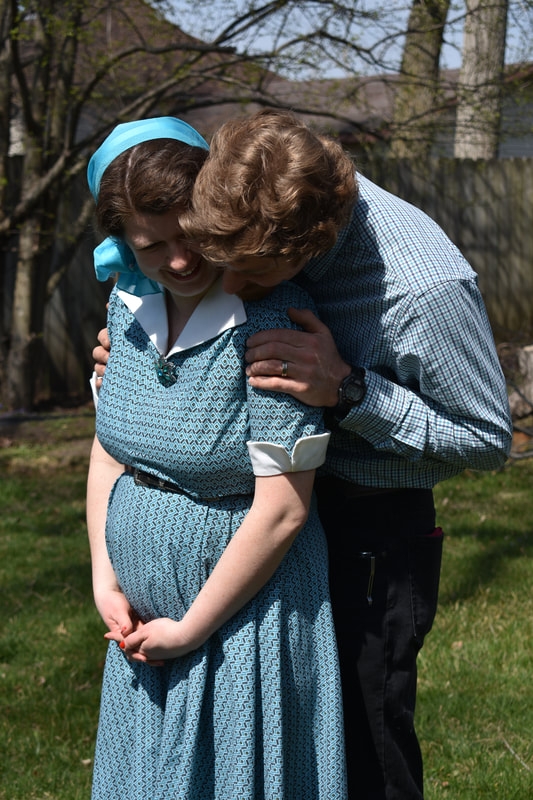
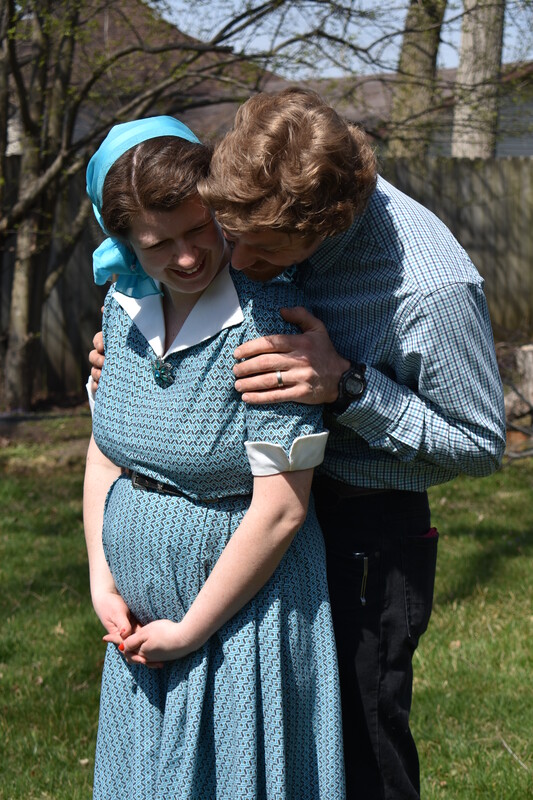
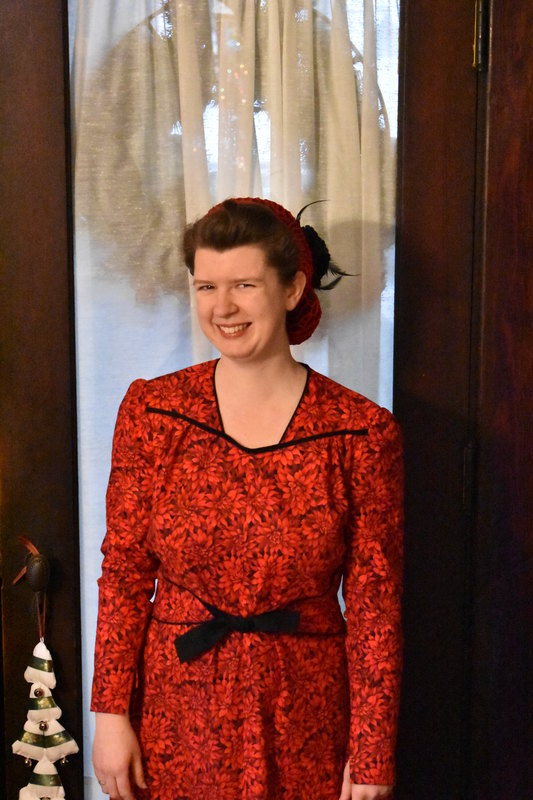
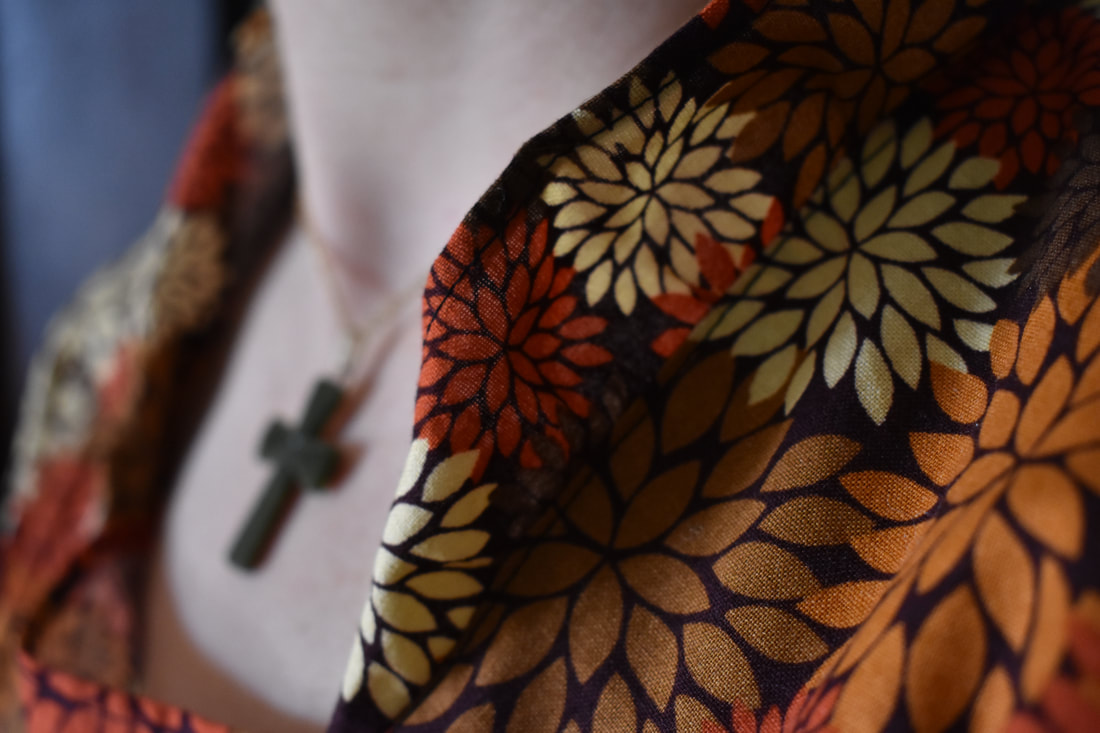
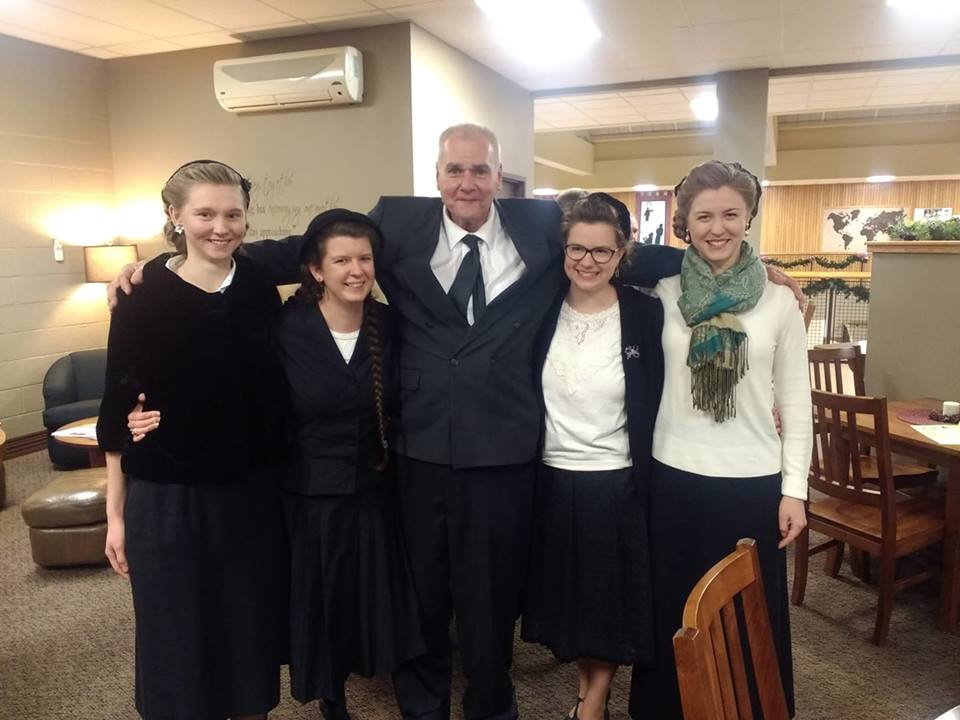
Anyway, I am pleased with it...and I got a couple compliments on it throughout the course of the day.
Picture
Picture
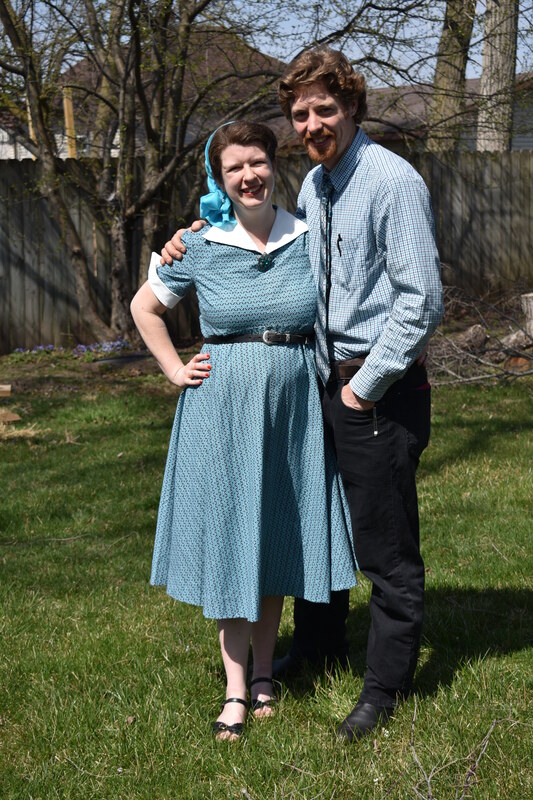
I love my husband's thick and wild hair!
Picture
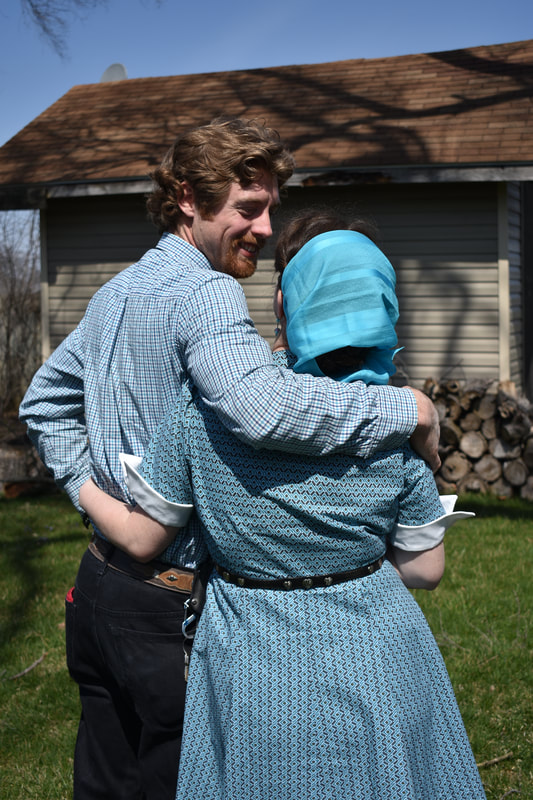
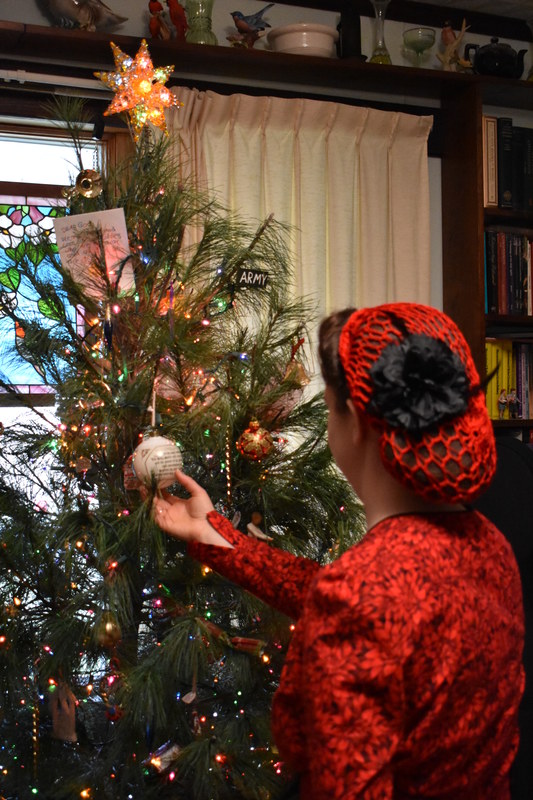
I just happen to have this scarf in my collection that matches almost perfectly. I wanted something bright on my head for Easter Sunday rather than one of my (several) black felt hats--any of which would have gone with it.
I have plans on making myself some more pieces in the near future...so stay tuned for whatever pops up here next!

--Racheal--

0 Comments

Hello, Hello, Hello!!

2/11/2021

1 Comment

 
Greetings, readers!
I have no idea if anyone really looks at this space anymore, but hopefully I will be back with a little more regularity!

When I left off way back in March of 2019, life was entering a hectic stage. My younger sister had just gotten engaged and my family had plenty of ups and downs during the months that passed between engagement and wedding. And I did a lot of sewing...I made two bridesmaid dresses (not to mention the mock up to test the pattern), six vests, six bowties, helped a tiny bit with the wedding dress, and did an addition to my mother's dress. I literally did not finish all the sewing until about 4 days before the wedding, about the time the first people began arriving.

Before the wedding sewing though, I did get my new blue plaid 1860's dress made (mentioned in the last post) and got to wear it a couple of times. The first day I wore it, it was rainy so it got very wet...my poor dress was hanging dreadfully as my hoops got all bent out of shape due too all the weight of wet petticoats and dress skirt! (It was a little embarrassing...)

Two weeks after my sister's wedding...I got engaged! To my new brother-in-law's older brother. (We like to joke about double in-laws.) I didn't get much sewing done after that for various reasons, until I plowed into my own wedding sewing in earnest.

I had a couple of wedding dress mock-up fails before I got good and settled. I managed to get my dress fully completed the week before our wedding...pushing it, I know. I also made the wedding party vests and bowties (bowties are fun, I think). Thankfully, my three bridesmaids (my two sisters and childhood best friend) all are seamstresses as well, so I left the design more or less in my older sisters hands (giving yeas and nays as I was asked to) and she dealt with all the questions and issues that arose.

Three months later, my new sister-in-law got married. I was requested to make one of the bridesmaid dresses and the wedding party and a few other family member's vests and bowties. That came up to three men's vests, and one little boy's vest (little guy stole the show with his grin!), and a total of seven bowties.

Let's just say, three weddings in a 12-month period puts a lot of miles on a sewing machine!

Since the last wedding, I have done a little mending for myself, and several stacks of alteration (mostly just hem shortening) for an old friend of my mother-in-law. I have made myself one dress (with hopefully a few more in the near future).

Now I know you want photographs...so I will give you a few all the above mentioned undertakings (unless I forgot to take photos or lost them when my hard-drive crashed before the first of the three weddings mentioned here!)

First is a picture of my blue plaid 1860's dress that someone sent me:
Picture
This was the second day I wore the dress over the weekend...you can see the hem is all dirty...and *gasp* my petticoat!! (Luke usually wears butternut, but wore blue for the Memorial Day parade in 2019.)

K+E's Wedding

Picture
Picture
I forgot I also made pocket squares....
Picture
The goal with the bridesmaid dresses was to somewhat mimic the lines of K's dress. Mine fit the least best I think...and after I made it, I realized why. My mock-up had some stretch in it due to the weave of the fabric. This brocade, however, did not. So I barely got into mine...and the bust darts were all wrong. (Grrr!) There was not enough material for me to make another one though.

On the really positive side though--we cut them (A, our sister-in-law and I) very carefully so that the pattern matched! It was so nice to see that part come together beautifully. (The guy's vests didn't match quite so well, but as those seems were under the arms, it far less noticeable.)
Picture
I was also the shortest, stoutest girl...I don't think I'm particularly drawn to this style....but all the other girls are more slender (and taller), so it really looked lovely on them.
Picture
I forgot I made this vest too. His sister had made him one already, but it was too short and I took on the job of making the replacement.
Picture
My parents... <3 I made the shawl thing on Mama's dress.

My+Luke's Wedding

I did take a few in-progress pictures, but I think I'll just go straight into completed pictures. (And I still don't have all of my wedding pictures, over six months later...the younger of my two sister-in-laws who was the second shooter at my wedding, hasn't gotten them too me yet. Of course, I haven't made a huge stink over it either! :D) I don't have much in the way of detail shots, but the entire dress had a lace overlay. The decorative lace panels and trim, plus the satin bows were repurposed off a 1990's wedding dress Mama had picked up at Goodwill several years before. 

I had to make a second bodice after fully completing one out of my dress fabric. I guess I did one of those aggravating body-shifts I do after completing the mock-up bodice! (I have been nicknamed a shape-shifter when it comes to clothing fitting.) Anyway, the final bodice was a wee bit too big, but not so much as to make it look like I was wearing a sack. I was able to take the seams in a little, which helped.
Picture
This is about as close as a shot that I have of bodice details. Mama did the beading around the satin "collar"(basically a wide binding band). I had wanted orange blossoms in my hair, but real ones were out of the question, and the fake ones I liked were likewise out of the question (sorry, I cannot spend over $300 for clay flowers! I'd rather put that money into other things), so we found a tiara at Hobby Lobby (on sale no less!) and I was very pleased with it. Then Mama comes home one day with a spray of orange blossoms for my bouquet--so I was a bit spoiled after all. :)
Picture
Love him!! <3
Picture
I knew I wanted the bridesmaids to have full-skirted 1950-ish dresses in red satin. That is partly my older sister's fault because she's kidded me for a couple of years about getting her "red Southern Belle" dress for my wedding! :D (But I wasn't going for an 1860's look, so opted for 1950's for them instead.) My own dress has a few 1770's inspired touches--which is appropriate for an early July wedding!
Picture
Again, I forgot I made pocket squares! The vest fronts are actually a cotton twill, while the buttons are satin covered with scraps from the ties and pocket squares. I learned something with these bowties--if making them out of lightweight satin, they need either interfacing or to be at least three layers thick! At any rate, they had somewhat floppy ties because I didn't do either of those things...
Picture
I cannot remember for sure...but I think I made my nephew's vest, too. His mother made his bowtie though.
There was only one design feature for my dress that I absolutely knew I wanted without a doubt. A train. I have always wanted an awesome train. All other features were open to question, doubt, and change. The pattern I used did not have a train...so I drafted one. I'll let you judge for yourself if it turned out well or not! ;)
Picture
It was everything I hoped for!
Picture
Picture
Picture
This pose was Luke's idea...something about now I couldn't get away! :D (Not that I wanted [or want] to!)
Picture
For all three of us girl's weddings, I have worn my hair in pin-curls, more or less down. I had different plans for my hair, but a test run gave me a headache and I know Luke likes it when I curl it and wear it down...so I wore it like this for the ceremony and these photos. I put it up for the reception because it was outdoors and in the low 90's.
Picture
Picture
This has to be one of the more epic ways for the bridal party to arrive... :D
Picture
I knew what I wanted for foot ware. Not snazzy high heels. Not flats. No. Something sturdy and comfortable...and ME. That would be a pair of cowboy boots. First, I bought a pair of Ariats (my favorite brand), but they were too small and not quite as light-colored as they looked on the computer screen. They were marked down and I thought I'd risk a slightly smaller size than I usually wear because shoe sizes seem to have changed in the last few years (they only had that size left). I ended up sending them back.
I found the ones I did wear on Ebay (brand new)...they are made in Mexico, absolutely gorgeous (though they smelled a little from the dye), full grain leather, and total princess boots. They are a tad tight (I can't get my feet in them if they are at all swollen; I barely got them off on our wedding night!), but they most definitely did the job. The humorous part of the tale is the bottoms were slick (new, unscuffed leather soles), so while walking down the slight incline of the church's aisle with Daddy, I was concentrating on not sliding! (I think you can see that slight stiffness in my face in the photos...I was grinning and happy, but also mentally going, "Don't slide and fall down. Put your feet down carefully and firmly...don't fall down...")
Picture
Picture
That wraps up the middle wedding. I only have a total of four photographs from the day of A's wedding...and only one shows some of my handiwork:
Picture
It's grainy because I downloaded off FB (before I deleted my account recently). The bridesmaid who can be seen made her own dress. The one who cannot be seen is the one whose dress I made. I made the groomsmen's vests and ties and pocket squares, as well as a vest and tie for the father of the bride and nephew of the groom. Plus ties for the greeter and the two ushers (one of whom was my husband). I also helped A take in her bodice a little and fitted the shoulders of her gown.
Following are a few random pictures of things I have either made or fixed in the last few months:
Picture
Repaired this leather jacket for one of my young brother-in-laws for his birthday.
Picture
A little house dress for my grandma for Christmas. I hear it was a bit large in the shoulders (which I was afraid of as she's pretty tiny in the shoulders at this point). But she likes it all the same. :)
Picture
Last thing I made myself. A wearable pattern test (once it warms up!) I've had that fabric for years...and finally put it to good use. (Please forgive the dusty mirror. I've not been feeling the greatest lately so some of my housekeeping is a little embarrassing right now.)
I think that pretty much sums up the latest stitchery insanity from the newlywed. In conclusion, weddings are delightful and sewing for them is fun, but I'm also glad to be able to get my hands back into my favorite fiber--cotton.

Until next time!

--Racheal--

1 Comment

Corset Cover

3/29/2019

0 Comments

 
I have two 1860's day dresses planned. One of them (the second I intend to make) being a pale plaid silk...that is going to need an extra layer I believe to keep my corset from showing through. So I tackled a corset cover the other day. It is essentially just an alteration of my usual dress bodice.

It doesn't look overly "conventional" with the neckline being taken up by the button placement, but it works. It was a quick one afternoon project. I machine-stitched my button holes (it's underwear that no one is going to see!) and used modern plastic buttons from the very large stash from the men's dress shirts that we repurpose. I decided against sleeves (I have extant examples both with and without sleeves)...and just finished the edges with bias tape. I was going to put a little lace on it, but couldn't find any to suit my fancy in the stash, so I didn't.

In all, I like the way it turned out.
Picture
Picture
Picture
Top-stitched my darts and the waistband.
Picture
Next on the docket...cotton blue/cream plaid dress!

--Racheal--

0 Comments

A Stitchy Tuesday

2/13/2019

0 Comments

 
Last weekend, my sister and I met up with a couple of girl-friends and went shopping. There is one great asset to going to the Goodwill in a city...people get rid of their expensive clothes (and shoes! I got a pair of boot which would have originally cost nearly $700 for under $7.00!) I walked out with three new sweaters--not that I really needed them--but I do love a nice sweater. 

My problem? No more drawer space in my sweater drawer. Literally. It is already packed. 

My solution? Take the mending and stuff needing alteration out of another drawer. Just enough room for my new sweaters. 

Now...I had a stack of things sitting there looking me in the face, asking the inevitable question: How long are we going to sit here while you move us from one spot to another?

"Not very long", said I. 

I got all but one of them fixed up yesterday. 

I started with the mending. In total, the seams were less than 12" combined.
Picture
Picture
From there, I moved onto a T-shirt overhaul. I do not like crew-necks (even when the shoulders fit) because they ride back and choke me. I do not like turtlenecks for the same reason. (It is weird how the only time I can wear stuff really up around my neck without it bothering me is when I wear historical clothing--but I think that is because they fit differently and so the neckline stays in place). So I found a tutorial...and tried to copy it. It wasn't an entire success, but neither was it an entire flop.
Picture
Picture
More like a a deeper crew neck, but I think it'll do. 

Then I turned to those nice denim skirts Mom had bought me a while back. They were too short for me as they were, so I decked them out with lace. :) They took a little longer because I basted the lace before stitching in on the machine so I could top stitch.
Picture
I extended the lace on this one by sewing it to a two-inch wide strip of material which then got stitched to the skirt. 
Picture
(I forgot to turn the flash on for this one...)
I had to fill in the split on this one, so I ended up with a triple-layer of lace. I completely winged and free handed this job (thus fulfilling my title of "haphazard seamstress" to a T) and it turned out pretty nicely if I do say so myself. Probably the most "unorthodox" thing about it is the way I did the split. The lace is hand gathered and only tacked to keep it from drooping. This was fun. :)

I have one thing left in my pile. A pair of jeans which I am going to cut off below the pockets and sew some fabric on to make a nice, cheery summer skirt. Still debating on the triple-layer in three different green fabrics or using the red and blue striped fabric... 

Oh yes...I also finished up a pair of socks! So a busy hand-work day...

--Racheal--

0 Comments

Accordion Strap Repair

1/19/2019

0 Comments

 
While visiting friends over the New Year holiday, the older brother of my bomber jacket friend got a hold me and said, "I've got something on my accordion I want to show you..." Okay, sure...

​"Do you think you could fix my straps?" 

Of course. Shouldn't be a hard job...
Picture
The before picture. Only one of them actually had holes in the corduroy, but the other one was pretty close behind, so I figured I might as well do them both...I ripped off some felt down at the bottom of the straps before I took the picture. We decided not to replace that.
Turns out, in some ways, I think it was harder than the jacket--probably because the holes in the leather were actually smaller and I was working with narrow strips of leather and several  layers of corduroy and padding.

In addition to making new covers (I had to piece my corduroy for the job since I was working with some scraps I "just so happened" to have), I beefed up the padding a little bit. I didn't figure a little extra padding over the shoulders would hurt him any since he's a slightly built gent. :D
Picture
The components (above): the original padding, a piece of black felt, and polyfill. Below...completed padding, quilted to keep the polyfill from sliding around.
Picture
Picture
The new covers, wrapped and pinned together. I went ahead and whip-stitched them closed.
Picture
One of two sewing helps (the other was a drawer pull which I buckled the straps to--acted like a third hand and gave me tension). The rubber band was my "fourth hand" holding the corduroy more or less in place while I stitched--I moved it along and along.
Picture
Finished!!
Picture
My stitching is not perfectly straight (nor for that matter are the padding pieces lined up perfectly on the leather)...and there are visible knots if you look closely, but it should hold.
Now...I just have to get these back to my accordion playing friend so he can begin to make beautiful music again! :)

--Racheal--

0 Comments

Poinsettia Christmas Dress

12/26/2018

0 Comments

 
When my last dress worked out for me, I knew that my dream to make a Christmas dress out of a piece of gorgeous red poinsettia fabric I've had in my stash for years now was finally going to come true.

With some very minor pattern alterations out of the way, I went to work...
Picture
A wee take up in the shoulders, back, and under the arms.
Because I was going to pipe the neckline and the waist insets, I figured up how much I needed (somehow I under-measured??) and went about making my own piping. This was the third time I have made my own piping and I find it rather fun (in addition to being so much cheaper than buying it pre-made!)
Picture
The ironing board cover is getting to *really* need replacing...
I made the waist-tie for this dress out of the same black material for a contrast tie, unlike the self-fabric tie of the previous dress. 
Picture
A lot of pinning, basting, and top-stitching ensued. I am happy to report that the piping matched up at all of the side-seams except for the bottom of the zipper...which was not something I could readily remedy and so decided to let it slide. :}
Picture
I had another "first" for me in this project--double-layer piping:
Picture
The finished dress was, for Christmas Day, paired with black-leggings (because I was cold!) and I tried to get a 1940's look with a red (nylon) snood and black hair-flower. I didn't put shoulder pads in...might have given it a more period appropriate look, but I forgot to, then didn't want to worry with them. :D
Picture
Picture
Picture
Hope y'all had a very Merry Christmas!! 

Wishing you a Happy and Blessed New Year!!

--Racheal--

0 Comments

2018 Does 1970's Does 1940's

12/18/2018

0 Comments

 
Generational spanning...that's what we'll call it!

Technically though, since this fabric was bought several years back, it probably is more like 2016 does 1970's does 1940's...at any rate...I pulled out another 1940's pattern I had yet to test, a hunk of fall-color-schemed material and went to work.
Picture
I essentially did view B---with long sleeves.
Now I don't normally wear a vintage 16...but I keep finding that sizes that I "don't wear" are working for me with some minor tweaking. Running a few measurements on the pattern pieces (I confess I never did "fit" this one on myself), I determined I needed a little more room in the hips and left the rest of the pattern as it was. As it turns out, I could have stood to remove a little width from the shoulders and a slight bit of length in the back, and in the torso under the arm. But like I said...I didn't fit it. It also didn't occur to me to perhaps shorten it under the arms.

The only other "alteration" (other than a pattern piece I had to draft) was to narrow the sleeve seams from .5" to .25".  

​About that pattern piece though: 
Picture
The pattern piece for the back waist inset was missing...so I looked at the drawing on the pattern inset and let go and drew. I think it worked pretty good. :D

It was a really simple dress to put together, the most complicated part being the waist inserts...I basted them before top-stitching. Next time, I think I will try to make sure front and back insets match up a little better...but I let it go with this time since it's very busy print. 
Picture
I use random left over pieces of thread from previous projects for my basting...
Picture
I decided to "jazz" it up with ruffles--at the neck, the sleeves, and the hem. 

I think the neck ruffle was a bit of a flop, so I ended up doing some folding and tacking to make it look better (and make it stand up).  ​
Picture
So they may be a little impractical for cooking and washing dishes, but as I can flip them up a couple of inches, I'll manage! :D
Picture
Anyway, with a little more tweaking (narrowing the shoulders and shorting the upper portion of the dress), I think I'll be quite happy with this pattern. As is...it is quite wearable.
Picture
Picture

--Racheal--

0 Comments

Black 1940's Suit

12/12/2018

0 Comments

 
 I am very bad about getting good outfit pictures. Possibly because I usually get my stuff made on a deadline and then immediately wear it without having time and opportunity to pose in my clothes. (Hmm...almost a rhyme there.)

Anyway, because I was singing Tenor in the annual performance of Handel's "Messiah", I needed a black skirt (which I already own a couple of) and a black jacket (which I also own at least two of)...not satisfied, I decided that, no...I must make a new suit! Based of course, off my favorite 1940's suit pattern (which I still obviously haven't gotten a picture of since last one I made).

I used a polished cotton twill--supposedly the same stuff (only black instead of blue) that I sewed my riding habit out of. Seemed slightly lighter weight to me...but maybe it wasn't really. I faced the jacket with some of the black polyester lining material I had not yet put away from the bomber jacket repair. I tacked the lining down, as well as the collar points. 

At any rate, I switched up the neckline and drafted a rever-style collar for this particular suit. The skirt was unaltered, except for the curved seam in the waist band like I did in the last skirt I made from the pattern. I hereby confess that I did not take oodles of progress pictures. I was on a deadline, somewhat foggy brained, and trying to spend my time doing a good job making the suit rather than doing a good job of taking pictures of the process.

So without further ado, the two that I took: Skirt and Jacket...
Picture
Top-stitched the pleats as well as the waistband.
Picture
Top-stitched the revers for an added element of "professional".
Of course I had fit problems. Why did you even ask? :D

I seriously need to make a muslin to use as a pattern for this suit. The skirt was a bit big (I've lost a little weight again, so that helped that) and the jacket was close to immense in a few spots. 

In the end though, I was quite happy with it. And so far...this is the only photo of me wearing the thing (sent by a kind friend):
Picture
The other girls all sang alto and consequently didn't wear their black jackets/sweaters during the performance. The handsome tall man in the middle--just one of the nicest bass singers you'll ever meet. ;)
And now I have snatches of "Messiah" dancing through my head. I'm already looking forward to next year and, Lord willing, I will sing better (and not get lost in the middle of "His Yoke is Easy and His Burden is Light" during the actual performance. The one and only time I got lost in that piece...and the thing was live! :D)

--Racheal--

0 Comments

Leather Bomber Jacket Refurb Job

11/19/2018

7 Comments

 
At "Messiah" practice last week, a friend held out his leather bomber jacket and asked, "Could you fix this for me?"

Well..."ort to, ain't never" as the old family saying goes. So I accepted the job without fully realizing the extent of what I was getting into. 
Picture
Not that I would have turned the job down if I had realized that it wasn't just one underarm that needed resewing (the leather part, not the lining--that was intact until I ripped it open)...but all the pockets needed repairing too!
When I turned the first sleeve inside out, I realized that the lining was starting to fall apart (this jacket belonged to my friend's grandfather originally), so I asked him, "You want me to reline the sleeves, too?"  Getting an affirmative, I tacked that on to my list. 
Picture
My guess would be from the wear, that my friend's grandpa was also right handed. The seams were pulled more as well.
I decided that instead of completely ripping the coat apart to actually replace the sleeve linings, that I would just recover them. We'll get there in a minute.

I started with the leather outer shell, sewing up the underarm seam first. I used double strand embroidery floss and sewed in the holes from the original seam. 
Picture
I can assure you--if I hadn't been working with pre-poked holes that my stitches would not have been near as neat!
I sat cross-legged on our leather ottoman for roughly two afternoons with the leather work portion of the job:
Picture
"Knit one, purl one..." Oh wait...wrong kind of stitching! ;D
The underarm was a breeze...and then I got to the first pocket and came face to face with something I had totally missed at first--it wasn't just the pocket facing piece, but the actually pocket​ was coming free! I had to work inside the jacket (thankfully, I had not sewn the lining back up yet), and the very bottom of that seam was a little tricky, though I don't think it looks too bad in it's finished state.
Picture
Picture
Most of the visible stitching here is my work.
I enjoyed this job, except when I stabbed myself with the needle (surprisingly only twice during the entire project and only once bad enough to bleed--and then I left blood on the pocket flap ;P ). I had some wiggly stitches here and there, but I think you'd really have to be looking for them.

Sleeves then. I actually made two stabs at a sleeve pattern. This first was really awkward:
Picture
Yes, I tried tracing around it, trying to get the proper curve for the sleeve cap. When I went to cut out the lining pieces, I looked at it, and said, "Nope. Do it right." So I got my sister (such a cute and game model!) and did my first ever draped sleeve!
Picture
Sleeve pattern in the test mode...
Now, no doubt there are flaws, but it sure seemed to work! 

I cut the new linings out of a hunk of black (I just couldn't put pink inside a man's coat sleeves!) and spent a couple of hours total trying to do neat, very secure, small stitches. 
Picture
Fini!
When I got to the second sleeve, I realized that I forgot to see the body lining back up, so I had to stop and stitch that. Thankfully at that fuzz-wuzz covers my less than beautiful stitch-work on the side seam (try stitching something you can't see the edge of clearly!)
Picture
Sleeve cap line.
Picture
Sleeve cuff line...I sewed it to the ribbed part rather than the original lining.
Anyway...I'd take this job on (or one similar again). Hope my friend is happy with his newly mended and refurbished bomber jacket! :)

--Racheal--

7 Comments

My Newest 1940's Dress

11/15/2018

0 Comments

 
I spent the entire month of September in preparation for Remembering WWII, on my feet at an ironing board, or sitting at a sewing machine (except for meals, evening handwork, and sleeping) making doll dresses. Before that, I had spent a week or so making aprons. 

Someplace toward the end of the month (before the event), I was able to get my own new outfit made. My test garment was the one I wore to the event...darned holes in the material and all. Guess it didn't look brand new that way. ;)
Picture
I had to take it up in a few places and raise the neckline a little, but other than that, it was pretty much an easy job. I did a snap placket at the side rather than a zipper, mainly, if I recall correctly because I didn't have one in the right size and model (in other words, a non-invisible zipper).
Picture
I like the fit and style, so I plan on making some more of these.

By the way, I had a total blast at RWWII, I was B-U-S-Y all day long. While I was volunteered at the Veteran Area, I really didn't spend much time there, the rest of my day being either mainly at the Vendor Area and at my other volunteer post--the Stars and Stripe Canteen.
Picture
I cannot remember this gentleman's name...this is the second year I talked with him. He is *still* a flirt and quite hilarious. His wife, by the way, is a sweetheart.
Picture
My apron was made by my mom. Cheeky kid in the foreground is one of my 'brothers'...he was all wet because a guy he was throwing ice at dumped water all down his back. Couple 'o goofy kids... ;P
I have worn my dress several times since...and even wore it for my birthday:
Picture
Yes, I like it. I am certainly going to make some more!!

--Racheal--

0 Comments
<<Previous

    Archives

    April 2021
    February 2021
    March 2019
    February 2019
    January 2019
    December 2018
    November 2018
    July 2018
    May 2018
    April 2018
    March 2018
    February 2018
    January 2018
    September 2017
    July 2017
    May 2017
    April 2017
    March 2017
    February 2017
    November 2016
    September 2016
    August 2016
    June 2016
    May 2016
    April 2016
    March 2016
    February 2016
    January 2016

    Categories

    All
    1770's/1780's
    1860's
    1940's
    1950s
    1960's
    Alteration
    Baby Clothes
    Boy
    Cross-Stitch
    Custom Order
    Doll Clothing
    Dress
    Formal/Fancy
    Girl
    Historical
    Historical Tidbit
    Home Decor
    Knitting
    Me Drafted
    Mending
    Menswear
    Military/Military Inspired
    Millinery
    Mock Up
    Pants
    Personal
    Reenacting
    RompersbyRacheal
    Socks
    Top
    Underpinnings
    Vintage Pattern

    RSS Feed

    ”Remembering

    Projected Projects:

    •  1860's Underpinnings:
                  Petticoat
    • 1860's Silk Day Dress
    • 1860's Slat Bonnet
    • 1940's Formal 
    Follow my blog with Bloglovin
    Picture
Powered by Create your own unique website with customizable templates.